멋있는 시각 효과로 보는 즐거움이 있는 음악 플레이어.


■ 주요 특징


 - 머티리얼디자인 기반의 아름다운 사용자 인터페이스와 애니메이션 지원.

 - 앨범, 아티스트, 폴더별 음악 관리 및 재생 기능.

 - 노래, 앨범 및 아티스트간 빠른 검색 제공.

 - 바탕화면 위젯 지원.

 - 내장 태그 에디터 지원. (mp3, flac 및 기타 파일 형식)

 - 내장 태그 에디터에서 앨범아트 다운로드 기능 제공.

 - 싱크 가사 다운로드 및 표시 기능 제공.

 - 블루투스 헤드셋 지원.

 - 슬립 타이머 지원.


■ 유료 버전

 https://play.google.com/store/apps/details?id=winvibe.musicplayer4


■ 무료 버전 (광고외 기능 제한 없음)

 https://play.google.com/store/apps/details?id=winvibe.musicplayerfree4


x264 설정창을 기준으로 각각의 옵션들을 정리해 보겠습니다.

먼저 옵션 설명에 필요한 x264의 압축 과정을 간단히 요약하면 다음과 같습니다.


1) IDR프레임,I프레임,P프레임,B프레임 중 어떤 종류의 프레임으로 압축할지를 결정합니다.

  프레임의 종류가 결정되면 각각의 프레임은 다시 매크로블럭(Macroblock)이라는 16x16 크기의

  작은 블럭으로 나눠지는데 이 매크로블럭을 압축하는 방식에는 크게 Intra코딩과 Inter코딩이 있습니다.

  IDR, I프레임은 프레임 내의 모든 매크로블럭이 Intra코딩되는 프레임 이고,

  P프레임 내의 매크로블럭은 Intra코딩과 Inter코딩(전방향)의 두가지 방식이 모두 가능합니다.

  B프레임 내의 매크로블럭도 Intra코딩과 Inter코딩(전방향, 후방향, 양방향)의 두가지 방식이 가능합니다.


  1-1) Inter코딩은 움직임예측(Motion Estimation)을 사용하는 압축방식입니다.

       이미 압축돼있는 프레임을 참조하여 현재 압축하려는 블럭을 예측(Inter Prediction)하고

       예측된 블럭과 실제 블럭의 차이값인 예측오류데이터(Residual Data)를 계산합니다.

       이 때, 예측에 사용된 부분이 참조프레임의 어디에 있는지를 나타내는 움직임벡터(Motion Vector)도

       구해야 하는데 여기에서도 예측이 사용됩니다.

       H.264/AVC 표준 상에 정의된 여러가지 방법으로 PMV(Predicted Motion Vector) 즉, 예측된 움직임벡터를 산출합니다.

       이렇게 산출된 PMV와 움직임예측으로 구해진 실제 움직임벡터와의 차이값(MVD : Motion Vector Difference)을 구합니다.

  1-2) Intra코딩은 움직임예측을 사용하지않는 압축방식입니다.

       움직임벡터가 필요한 프레임 간 예측(Inter Prediction)을 샤용하지 않는 대신, 인접한 주변 블럭들의

       픽셀값을 직접 사용해서 현재 압축하려는 블럭을 예측하는 프레임 내 예측(Intra Prediction)을 사용합니다.

       Inter코딩과 마찬가지로 예측된 블럭과 실제 블럭의 차이값인 예측오류데이터를 구하는게 목적입니다.


2) 1번 과정에서 구해진 예측오류데이터를 압축하기 위해서 먼저 주파수변환을 수행합니다.

  주파수변환은 픽셀 영역의 예측오류데이터를 주파수 영역의 계수들로 변환하는 과정을 말합니다.

  주파수변환을 통해 예측오류데이터를 주파수 계수들로 분리함으로써 이후의 양자화 과정에서 효율적인 압축이 가능합니다.

  H.264/AVC 표준은 이전의 표준에서 사용되었던 8x8 DCT대신에 DCT를 약간 수정한 4x4 정수변환을 사용합니다.

  High Profile 이상에서는 4x4 정수변환과 8x8 정수변환을 선택적으로 사용할 수 있습니다.


3) 2번 과정에서 구해진 주파수 계수들을 양자화(Quantization)합니다.

  불필요하거나 덜 중요하다고 판단되는 주파수 계수들을 줄이거나 제거함으로써 압축을 수행합니다.

  이 과정에서 줄어들거나 제거된 주파수 계수들은 디코딩 과정에서 정확한 복원이 불가능하기 때문에

  실질적으로 데이터의 손실이 발생하는 과정입니다.


4) 양자화된 계수들은 다시 한 번 압축되는데 이 과정을 엔트로피 코딩이라고 합니다.

  엔트로피 코딩은 확률적인 방법을 사용해서 데이터의 크기를 줄이는 무손실 압축방식입니다.

  H.264/AVC 표준에서는 Exp-Golomb, CAVLC, CABAC 등의 방식이 사용되는데 양자화된 예측오류데이터에는

  CAVLC와 CABAC이 선택적으로 사용됩니다. (CABAC은 Main Profile 이상에서만 사용이 가능합니다.)


다음으로 MeGUI 의 설정창에 표시되는 x264 옵션들에 대한 정리입니다.


Main


Encoding Mode

인코딩 모드를 결정하는 부분으로 비트레이트를 배분하는 방법에 따라서 여러가지로 나뉩니다.

  - ABR : 1패스 평균비트레이트 모드입니다. 정해진 비트레이트를 크게 벗어나지 않는 범위 내에서 비트를 배분합니다.

  영상의 전반적인 모습을 알지 못하는 상태에서 정해진 비트레이트에 맞게 비트를 배분해야하기 때문에

  비트 배분에 있어서는 약간 효율이 떨어지는 방식입니다.

  어느정도의 비트레이트를 맞춰야하는 동시에 2패스 모드를 사용하기엔 시간이 부족한 경우라면 ABR모드가 적당합니다.

  비트레이트 단위는 kbit/s입니다.

  - Const. Quantizer : 고정 양자화 모드입니다. 보통 CQP 모드라고 합니다.

  고정된 양자화 수치(QP : Quantization Parameter)로 압축을 수행합니다.

  QP값은 3)번 과정에서 어느정도로 계수들을 양자화할지 결정하는 수치인데 값이 클수록 비트레이트는 낮아집니다.

  비트레이트를 특정해서 인코딩하는 ABR이나 멀티패스 모드에서는 정해진 비트레이트를 맞추기 위해서 QP값을 유동적으로

  조절하면서 압축을 수행하지만 고정 양자화 모드에서는 QP값이 일정하기 때문에 "비트 배분 조절"이라는 개념이 없습니다.

  따라서 인코딩된 영상의 비트레이트가 어떻게 될지는 인코딩이 끝날 때까지 예측할 수가 없습니다.

  QP값이 고정돼있기 때문에 화면이 복잡하고 움직임이 많으면 비트레이트가 높아지고, 반대로 화면이 단순하고 움직임이

  적으면 비트레이트가 낮아집니다. 비트레이트를 예측할 수는 없지만 영상 전체적으로 비슷한 화질을 보여줍니다.

  0부터 51까지의 값이 사용 가능하고 20 ~ 25 사이의 값이 주로 사용됩니다.

  - Const. Quality : 고정 레이트 팩터(CRF : Constant Rate Factor) 모드입니다. 보통 CRF 모드라고 합니다.

  화면의 복잡성을 고려해서 고정된 CRF수치로 비트를 배분하는데, 이 때 사용되는 배분 방식이 멀티패스 모드와 동일하기 때문에

  비트 배분의 효율성에 있어서는 멀티패스 모드와 거의 같다고 할 수 있습니다.

  단, CRF 모드 역시 정해진 비트레이트 없이 고정된 CRF 수치를 기준으로 비트를 배분하는 방식이기 때문에 인코딩된 영상의

  비트레이트를 사전에 예측할 수 없습니다. 이런 면에서는 CQP 모드와 비슷하지만 비트 배분에 있어서 CQP 모드보다

  더 효율적이기 때문에 특별한 경우가 아니라면 CRF 모드를 사용하는 편이 화질면에서 유리합니다.

  마찬가지로 0부터 51까지의 값이 사용 가능하고 20 ~ 25 사이의 값이 주로 사용됩니다.

  - Automated 2pass : 2패스 평균비트레이트 모드입니다. 총 2번의 인코딩 과정이 수행됩니다.

  첫 번째 패스에서는 프레임 종류, 각각의 장면에서 필요한 비트량 등을 분석해서 .stats파일에 기록합니다.

  (MB-Tree를 사용하는 경우에는 MB-Tree에 필요한 정보를 기록하기 위해 .mbtree파일이 추가로 만들어집니다.)

  두번쨰 패스에서는 첫 번째 패스에서 만들어진 .stats파일을 참고해서 실제 인코딩을 수행합니다.

  실제로 영상이 만들어지는 두 번째 패스에서는 .stats파일을 통해서 영상의 전반적인 모습을 알 수 있기 때문에

  정해진 비트레이트를 정확하게 맞춰주면서 동시에 효율적인 비트 배분이 가능합니다.

  비트레이트 단위는 kbit/s입니다.

  - Automated 3pass : 3패스 평균비트레이트 모드입니다. 총 3번의 인코딩 과정이 수행됩니다.

  기본적으로 2패스 평균비트레이트 모드와 같은 방식입니다. 첫 번째 패스에서 .stats파일을 만들어 내고 두 번째 패스에서는

  이미 만들어진 .stats파일을 갱신합니다. 마지막으로 세 번째 패스에서 갱신된 .stats파일을 참고해서 인코딩을 수행합니다.

  두 번째 패스에서 .stats파일을 한 번 더 업데이트하기 때문에 좀 더 정확한 .stats파일을 사용할 수 있다는 장점이 있지만

  그로 인한 이익은 아주 미미한 수준입니다. 인코딩 시간 대비 효율이 낮아서 거의 사용되지 않는 방식입니다.

  비트레이트 단위는 kbit/s입니다.

  - Lossless : 무손실 압축 모드입니다. CQP 모드나 CRF 모드에서 값을 0으로 지정하면 무손실 압축을 수행합니다.

  x264의 압축과정 중에서 데이터의 손실이 발생하는 부분인 3)번 양자화 과정을 거치지 않는 방식입니다.

  3)번 과정을 거치지 않기 때문에 2)번 과정도 생략되고, 1)번 과정에서 바로 4)번 과정으로 진행합니다.

  즉, 예측을 통해 구해진 예측오류데이터를 곧바로 엔트로피 코딩함으로써 무손실 압축이 가능하게 합니다.

  단, 무손실인 만큼 대부분의 경우 비트레이트가 굉장히 높아집니다.

  또한 무손실 압축은 H.264/AVC 표준의 High 4:4:4 Predictive Profile에서만 사용 가능한 방식입니다.

  따라서 x264의 Lossless 모드로 인코딩된 파일은 High 4:4:4 Predictive Profile에 해당합니다.

  프로파일의 이름처럼 H.264/AVC 표준에서는 Lossless 모드에서도 P, B프레임을 모두 사용 가능하도록 정하고 있지만

  x264 개발자들은 Lossless 모드에서 B프레임이 효율적이지 않다는 판단하에 P프레임만 사용하도록 하고 있습니다.


Presets

프리셋은 이용자의 편의를 위해 x264의 여러 옵션값들을 미리 설정해 놓은 메뉴라고 할 수 있습니다.

프리셋의 이름에서 알 수 있듯이 인코딩 속도를 기준으로 여러가지 프리셋이 마련되어 있습니다.

빠른 프리셋은 그만큼 압축 효율은 낮아지고 느린 프리셋은 압축 효율이 높습니다.

먼저 적당한 프리셋을 선택한 후에 추가적으로 조절할 옵션들이 있다면 설정창에서 직접 조절하는 방식으로 사용하면 좋습니다.


Tunings

튜닝 또한 이용자의 편의를 위해 x264의 여러 옵션값들을 미리 설정해 놓은 메뉴입니다.

튜닝의 이름에서 알 수 있듯이 인코딩하려는 소스나 목적에 따라서 여러가지 튜닝값이 마련되어 있습니다.

먼저 적당한 튜닝값을 선택한 후에 추가적으로 조절할 옵션들이 있다면 설정창에서 직접 조절하는 방식으로 사용하면 좋습니다.


AVC Profiles
프로파일은 H.264/AVC 표준에서 사용 가능한 여러가지 압축 기술들을 조합해 놓은 묶음이라고 볼 수 있습니다.
여러가지 프로파일이 정의돼 있지만 x264에서는 High, Main, Baseline 프로파일 중 하나를 선택할 수 있습니다.
(CQP, CRF 모드에서 수치를 0으로 지정하면 High 4:4:4 Predictive 프로파일이 선택됩니다.)
상위의 프로파일을 선택할수록 사용 가능한 옵션들도 많아지고 그만큼 압축된 영상의 디코딩에도 부하가 커지게 됩니다.
하나의 프로파일을 선택하면 해당 프로파일을 만족하는 영상을 만들기 위해서 몇몇 옵션들이 제한됩니다.
각각의 프로파일에서 제한되는 옵션들은 다음과 같습니다.
  - High Profile : No Lossless
  - Main Profile : No Lossless, --no-8x8dct, --cqm flat
  - Baseline Profile : No Lossless, --no-8x8dct, --cqm flat, No Interlaced, --no-cabac, --bframes 0, --weightp 0

AVC Level
레벨은 인코딩된 영상이 어느정도의 디코딩 자원이 필요한지를 표시해 주는 플래그라고 볼 수 있습니다.
H.264/AVC 표준에는 영상의 비트레이트, 해상도, DPB, CPB 등등 여러가지 요인에 따라서 프로파일마다 각각의 레벨을
정해놓고 있습니다. 레벨을 지정해 주지 않으면(Unrestricted/Autoguess) H.264/AVC 표준에 따라서 x264가 자동으로
인코딩된 영상의 레벨을 지정해 줍니다.
특정한 레벨을 지정해 주면 Presets이나 Tunings에서 정해진 참조프레임의 수를 해당 레벨에 맞게 조절해 줍니다.
단, 참조프레임의 수를 직접 지정해 주는 경우가 우선합니다.

Target Playback Device
MeGUI에서 자체적으로 지원하는 옵션입니다. 각종 재생기기에서 요구하는 스펙에 맞게 x264 옵션들을 조정해 줍니다.


Frame Type


H.264 Features

  - Deblocking : H.264/AVC 표준의 In-loop Deblocking 필터와 관련된 옵션입니다. In-loop Deblocking 필터는 1-1)번 과정에서

  참조프레임에 Deblocking 필터를 적용함으로써 좀 더 효율적인 움직임 에측이 가능하게 합니다.

  참조프레임은 이미 압축된 프레임이기 떄문에 블럭화 현상이 나타나는 경우가 많은데 이런 블럭화 현상을 줄여줌으로써

  Inter코딩시 에측오류데이터를 줄일 수 있습니다.

  Strength는 Deblocking 필터의 강도를 결정합니다. 낮은 값일수록 필터의 강도가 약해집니다.

  Threshold는 얼마나 많은 블럭에 Deblocking 필터를 적용할지를 결정합니다.

  낮은 값일수록 더 많은 블럭에, 더 낮은 강도의 Deblocking 필터가 적용됩니다. 

  각각 0이 기본값이고 -3 ~ 3 사이의 값이 주로 사용됩니다.

  - CABAC : Context-Adaptive Binary Arithmetic Coding의 약자입니다.

  4)번 과정에서 엔트로피 코딩에 사용되는 방식 중 가장 효율적인 압축 방식입니다.

  CABAC을 사용하지 않으면 CAVLC(Context-Adaptive Variable Length Coding)이 대신 사용됩니다.

  CAVLC보다 CABAC의 압축 효율이 더 높기 때문에 특별한 이유가 없다면 사용하는 편이 좋습니다.

  다만 압축 효율이 높은 만큼 훨씬 복잡한 방식이기 때문에 인코딩, 디코딩 모두 부하가 커집니다.

  Main Profile이상에서만 사용 가능합니다.


GOP Size
  I프레임은 참조프레임 없이 Intra코딩되는 프레임이기 때문에 키프레임이라고 하면 보통은 I프레임을 말합니다.
  하지만 다수의 참조프레임을 사용하는 H.264/AVC 표준에서는 단순히 I프레임인 것 만으로는 키프레임의 역할을 할 수 없습니다.
  I프레임의 뒤에 위치한 프레임이 다수의 참조프레임을 사용한다면, I프레임의 앞에 위치한 프레임을 참조하는 경우도
  있을 수 있기 때문입니다. 이렇게 프레임 간의 참조 관계가 I프레임을 경계로 하지 않을 수도 있기 때문에 특정한 I프레임에는
  IDR(Instantaneous Decoding Refresh)이라는 플래그를 달아줍니다. 이렇게 IDR플래그가 있는 IDR-I프레임은 뒤에 위치한 프레임이
  IDR-I프레임의 앞에 위치한 프레임을 참조하지 못하게 합니다. 따라서 IDR-I프레임만이 실질적인 키프레임의 역할을 하게됩니다.
  아래의 옵션들은 IDR-I프레임과 관련된 옵션들이고 IDR-I프레임이 아닌 I프레임과는 상관이 없습니다.
  - Maximum GOP size : IDR-I프레임 간의 최대 간격을 설정합니다. 기본값은 250입니다.
  - Minimum GOP size : IDR-I프레임 간의 최소 간격을 설정합니다. 기본값은 25입니다.
  - GOP calculation : MeGUI에서 자체적으로 지원하는 옵션입니다. 기본값인 FPS based를 선택하면 인풋 파일의 FPS에 따라서
  Maximum GOP size와 Minimum GOP size를 조절해 줍니다. 각각 FPS*10, FPS*1 이 사용됩니다.
  Fixed를 선택하면 사용자가 입력한 Maximum GOP size와 Minimum GOP size를 그대로 사용합니다.
  - Open GOP : Open GOP란 GOP의 마지막 프레임을 B프레임으로 압축함으로써 다음 GOP의 키프레임을 해당 GOP의 B프레임이
  참조할 수 있도록 만드는 GOP 구조를 말합니다. Open GOP로 압축되는 경우에는 키프레임에 IDR-I프레임을 사용할 수 없고 대신
  Recovery Point SEI가 삽입된 I프레임을 사용합니다. 이렇게 함으로써 GOP 사이즈가 작은 경우에 약간의 이득을 얻을 수 있습니다.
  x264는 기본적으로 Closed GOP를 사용하고 여기에 체크하면 Open GOP가 사용됩니다.
  
Slicing
  슬라이스는 여러개의 매크로블럭으로 구성된 인코딩의 기본 단위로, 하나의 프레임은 여러개의 슬라이스로 구성됩니다.
  물론 프레임이 한 개의 슬라이스로 구성되는 것도 가능하며 x264는 기본적으로 프레임당 한 개의 슬라이스를 사용합니다.
  이 옵션은 x264가 프레임을 여러개의 슬라이스로 나눠서 인코딩을 수행하게 만드는 옵션입니다.
  일반적으로 사용되는 옵션은 아니고 블루레이 스펙에 맞는 영상을 만드는 등 특별한 경우에 사용되는 옵션입니다.
  하나의 프레임을 여러개의 슬라이스로 나눠서 인코딩하는 경우 프레임 내 예측에 제한이 가해지는 등
  기본값인 하나의 슬라이스를 사용하는 경우보다 압축효율이 낮아집니다.
  - Nb of slices by Frmae : 프레임당 슬라이스의 수를 결정하는 옵션입니다.
  - Max size (in bytes) : 슬라이스의 최대 크기입니다. (단위는 bytes/slice)
  - Max size (in MBs) : 슬라이스당 최대 매크로블럭 수입니다. (단위는 MBs/slice)

B-Frames
  - Weighted Prediction for B-Frame : P-Frame Weighted Prediction 옵션과 마찬가지로 H.264/AVC 표준의 WP을 사용합니다.
  이 옵션에 체크하면 B프레임에서만 사용 가능한 Implicit WP이 사용됩니다.
  특별한 이유가 없다면 사용하는 편이 좋습니다.
  - Number of B-Frames : 연속한 B프레임의 최대 개수를 정하는 옵션입니다.
  Adaptive B-Frames옵션과 함께 사용하는 편이 좋습니다.
  기본값은 3이고 최대 16까지 사용 가능합니다. 3 ~ 5 사이의 값이 주로 사용됩니다.
  - Adaptive B-Frames : 연속한 B프레임의 수를 정해진 범위안에서 유동적으로 조절해 주는 옵션입니다.
  연속한 B프레임의 수를 고정시키는 것보다 상황에 맞게 효율적으로 조절해 주기 때문에 화질면에서 유리합니다.
  기본값은 Fast입니다. Optimal과 Fast가 주로 사용됩니다.
  - B-Frame bias : Adaptive B-Frames에 적용되는 옵션입니다.
  연속한 B프레임의 수를 조절할 때 얼마나 적극적으로 B프레임을 사용할지 정하는 옵션입니다.
  기본값은 0이고 높일수록 B프레임이 많이 사용됩니다. 특별한 이유가 없다면 기본값을 사용하는 편이 좋습니다.
  - B-Pyramid : 1-1)번 과정에서 움직임예측시 B프레임도 참조프레임으로 사용될 수 있도록 허용하는 옵션입니다.
  이전의 표준들에서는 B프레임이 참조프레임으로 사용되지 못하지만 H.264/AVC 표준에서는 Inter코딩시 B프레임도
  참조프레임으로 사용될 수 있습니다. 기본값은 Normal이고 기본값을 사용하는 편이 좋습니다.
  블루레이 스펙은 H.264/AVC 표준과 다르게 B프레임이 참조프레임으로 사용될 때 약간의 제약이 있습니다.
  P프레임이 B프레임을 참조하지 못하고 B프레임도 바로 옆에 있지 않은 B프레임은 참조하지 못하게 하고 있습니다.
  이런 블루레이의 추가적인 제한을 맞춰주는 옵션이 Strict입니다.
  당연히 Normal보다는 효율이 떨어지기 때문에 특별한 경우가 아니라면 사용되지 않습니다.

Other
  - Number of Reference Frames : Inter코딩시 사용되는 참조프레임의 수를 결정합니다.
  값이 클수록 압축 효율이 높아지지만 역시 인코딩 시간은 늘어납니다.
  기본값은 3이고 3 ~ 5 사이의 값이 주로 사용됩니다.
  Minimum GOP size, Maximum GOP size값에 따라서 IDR 또는 I프레임이 조건에 맞게 사용됩니다.
  - Number of Extra I-Frames : IDR-I프레임 또는 I프레임(Extra I-Frame)을 얼마나 사용할지 결정하는 옵션입니다.
  장면이 전환되는 부분이나 급격하게 화면이 변하는 경우에는 Inter코딩의 효율이 낮아지는데 이 때 IDR프레임 또는 I프레임을
  사용함으로써 얍축 효율을 높일 수 있습니다. 값을 높일수록 사용 빈도가 높아집니다.
  기본값은 40이고 특별한 이유가 없다면 기본값을 사용하는 편이 좋습니다.
  - P-Frame Weighted Prediction : 화면이 어두워지거나 밝아지는 페이딩 장면같은 경우, 움직임예측이 힘들기 때문에
  Inter코딩의 효율이 낮아지는 경우가 많습니다. 이런 경우에 어두워지거나 밝아진 일련의 프레임들의 유사성을 높이기 위해
  밝아진 프레임은 밝아진 만큼, 어두워진 프레임은 어두워진 만큼 반대 방향으로 가중치를 줌으로써 Inter코딩시 압축 효율을
  높이는 방법이 H.264/AVC 표준에 정의된 Weighted Prediction(WP)인데 WP에는 크게 두가지가 있습니다.
  P, B프레임에서 사용 가능한 Explicit WP와 B프레임에서만 사용 가능한 Implicit WP입니다.
  이 옵션은 P, B프레임에서 사용 가능한 Explicit WP에 관련된 옵션으로 기본값은 Smart입니다.
  Disable을 선택하면 사용하지 않게 되고 Blind는 Smart보다 빠르지만 압축 효율은 떨어집니다.
  - Encode Interlaced : 이 옵션에 체크하면 인터레이스 인코딩 방식을 사용합니다.
  인코딩 방식은 크게 프로그레시브와 인터레이스로 구분할 수 있는데 전자는 일반적인 프레임 단위의 압축방식이고
  후자는 프레임과 필드를 구분해서 압축하는 방식입니다.
  H.264/AVC 표준의 인터레이스 인코딩 방식은 다시 두가지로 나눌 수 있는데 하나는 PAFF(Picture-Adaptive Frame-Field)이고
  또 하나는 MBAFF(Macroblcok-Adaptive Frame-Field) 입니다.
  x264의 인터레이스 인코딩 방식은 MBAFF로서 매크로블럭을 위 아래로 두 개씩 짝지은 다음 프로그레시브 코딩할지
  인터레이스 코딩할지를 정하게 됩니다. 다만 아직은 Adaptive방식이 아니라서 모든 매크로블럭 쌍들이 인터레이스 코딩됩니다.
  프로그레시브 인코딩 방식에 비해서 압축 효율이 많이 떨어집니다.
  인풋 영상의 필드 오더에 따라서 TFF, BFF를 선택해서 인코딩할 수 있습니다.
  - Pulldown : 프로그레시브 스트림에 풀다운 플래그를 삽입해 주는 옵션입니다. 소프트 텔레시네가 적용됩니다.
  - Adaptive I-Frame Decision : IDR-I프레임과 I프레임(Extra I-Frame)을 유동적으로 사용할지 결정하는 옵션입니다.
  이 옵션에 체크하면 장면이 전환되는 부분에서 IDR 또는 I프레임을 적응적으로 사용하게 됩니다.


Rate Control


Quantizers

  주파수변환된 계수들을 얼마나 양자화할 것인지 결정하는 수치인 QP값에 관련된 옵션들입니다.

  - Min/Max/Delta : 프레임당 양자화 수치(QP)의 최소값, 최대값 그리고 연속한 프레임 간에 증가하거나

  감소하는 QP값의 최대치를 조절하는 옵션입니다.

  기본값은 각각 0, 69, 4이고 특별한 이유가 없다면 기본값을 사용하는 편이 좋습니다.

  - Qunatizers Ratio (I:P / P:B) : I:P 수치는 P프레임을 기준으로 I프레임의 QP값을 산출할 때 사용되는 가중치입니다.

  P:B 수치는 P프레임을 기준으로 B프레임의 QP값을 산출할 때 사용되는 가중치입니다.

  P:B 수치는 MB-Tree옵션과 함께 사용되면, 지정된 값이 무시되고 MB-Tree에 의해서 자동으로 조절됩니다.

  각각 기본값은 1.4, 1.3입니다. 특별한 이유가 없다면 기본값을 사용하는 편이 좋습니다.

  - Deadzones (Inter / Intra) : 3)번 과정에서 사용되는 양자화 방식의 하나입니다.

  x264는 양자화 방식으로 Deadzones과 Trellis 중 하나를 선택할 수 있습니다.

  이 옵션은 Deadzones을 사용하는 경우에 적용되는 수치이고 기본값은 21, 11입니다.

  각각 0 ~ 32 사이의 값이 사용 가능하고 값을 낮출수록 미세한 디테일이나 필름 그레인 유지에 효과가 있습니다.

  x264는 Trellis를 기본적으로 사용하기 때문에 Deadzones을 사용하려면 Trellis를 사용하지 않아야 합니다.

  - Chroma QP Offset : H.264/AVC 표준에서는 Chroma블럭의 QP값은 따로 계산되지 않고 Luma블럭의 QP값에 따라서

  자동으로 산출되는데, Chroma블럭의 QP값을 산출할 때 사용되는 가중치입니다.

  -12 ~ 12 사이의 값이 사용 가능하고 기본값은 0입니다. 특별한 이유가 없다면 기본값을 사용하는 편이 좋습니다.

  Psy-RD, Psy-Trellis 옵션이 사용되면 각각의 수치에 따라서 자동으로 값이 조절됩니다.

  - Credits Quantizer : MeGUI에서 자체적으로 지원하는 옵션입니다.

  MeGUI의 Video Preview 창에서 Intro 버튼과 Credits 버튼으로 Intro / Credits 구간을 지정해 주면 해당 구간을

  x264의 Zones 옵션을 사용해서 고정된 QP값으로 인코딩하는데, 이 때 사용되는 QP값을 결정하는 옵션입니다.

  영화의 초반부나 후반부처럼 자막만으로 구성되는 구간은 비트가 많이 필요하지 않기 때문에 이 옵션을 사용해서

  해당 구간의 QP값을 높여줌으로써 비트를 절약할 수 있습니다. 기본값은 40입니다.


Rate Control

  - VBV Buffer Size : 비디오 버퍼 검증기(VBV)의 버퍼 사이즈를 결정하는 옵션입니다.

  - VBV Maximum Bitrate : VBV의 버퍼에 입력되는 최대 비트레이트를 결정하는 옵션입니다.

VBV(Video Buffer Verifier)는 비디오 버퍼의 크기가 제한되어 있는 하드웨어 재생을 위한 동영상을 만들거나

스트리밍처럼 전송용 동영상을 만드는 경우에 주로 사용되는 기능입니다. 기본값은 각각 0, 0으로 사용되지 않습니다.

각종 휴대기기나 하드웨어 재생기에서 재생할 목적으로 인코딩하는 경우에는 VBV를 사용하는 편이 좋습니다.

  - VBV Initial Buffer : VBV의 버퍼에 데이터가 어느정도 채워졌을 때 재생을 시작할지 결정하는 옵션입니다.

  0 ~ 1 사이의 값이 사용 가능하고 기본값은 0.9입니다. VBV가 사용되지 않으면 이 옵션도 무시됩니다.

  - Bitrate Variance : 1패스 평균비트레이트 모드에서 주로 사용되는 옵션입니다.

  정해진 평균비트레이트를 얼마나 정확하게 맞춰줄지를 결정하는 옵션입니다.

  1패스 평균비트레이트 모드의 목적은 정해진 비트레이트에서 크게 벗어나지 않는 동시에 효율적으로 비트를 배분하는 것인데

  이 옵션값을 높일수록 비트 배분을 효율적으로 하는 대신 정해진 비트레이트에서 벗어나는 정도가 커집니다.

  기본값은 1.0이고 특별한 이유가 없다면 기본값을 사용하는 편이 좋습니다.

  - Quantizer Compression : 화면의 복잡도에 따라서 비트레이트 배분의 가중치를 결정하는 옵션입니다.

  옵션값을 높일수록 영상 내의 복잡하거나 움직임이 많은 부분에서 비트레이트를 높여 줍니다.

  0 ~ 1 사이의 값이 사용 가능하고 기본값은 0.6입니다.

  MB-Tree와 함께 사용되면 MB-Tree의 강도를 조절해 줍니다. 값이 높을수록 MB-Tree의 강도는 낮아집니다.

  - Temp. Blur of est. Frame complexity : x264는 비트레이트를 배분할 때, 먼저 영상의 복잡하거나 단순한 정도에 따라서

  복잡도(Complexity)가 계산되고 이 복잡도에 따라서 비트를 배분하게 됩니다.

  이 옵션은 계산된 복잡도의 편차를 줄여줌으로써 프레임 간의 과도한 비트레이트 변동을 막아줍니다.

  기본값은 20이고 특별한 이유가 없다면 기본값을 사용하는 편이 좋습니다.

  Mb-Tree와 함꼐 사용되면 이 옵션은 무시됩니다.

  - Temp. Blur of Quant after CC : Temp. Blur of est. Frame complexity 옵션과 마찬가지로 프레임 간의 과도한

  비트레이트 변동을 막아주는 옵션입니다. 복잡도에 따라 비트레이트를 배분한 후에 적용되어 다시 한 번 프레임 간의

  비트레이트 편차를 줄여줍니다. 기본값은 0.5이고 특별한 이유가 없다면 기본값을 사용하는 편이 좋습니다.

  - Use MB-Tree : Inter코딩시 블럭 간의 참조 관계를 분석해서 참조율이 높은 부분의 비트레이트를 높여주는 옵션입니다.

  즉, Inter코딩시 여러번 참조된 부분의 비트레이트를 높여줌으로써 이후 반복되는 1-1)번 과정에서 예측오류데이터를

  줄여줄 수 있습니다. Quantizer Compression 옵션으로 MB-Tree의 강도를 조절할 수 있습니다.

  - Nb of Frames for Lookahead : MB-Tree의 블럭 간 참조 관계를 분석하는 데에 사용되는 프레임의 수입니다.

  기본값은 40이고 40 ~ 60 사이의 값이 주로 사용됩니다.


Adaptive Quantizers
x264의 AQ(Adaptive Quantization)은 블럭의 Variance(편평도)를 기준으로 QP값을 조절해 주는 옵션입니다.
하늘을 배경으로 하는 장면이나 화면의 어두운 부분, 또는 멀리서 바라 본 잔디밭이나 필름 그레인처럼 편평도가 큰 블럭의
비트레이트를 높여줌으로써 블럭현상을 줄이거나 미세한 디테일을 유지하는 데에 도움이 됩니다.
고정된 QP값을 사용하는 CQP 모드에서는 사용할 수 없습니다.
  - Mode : Variance AQ는 프레임마다 동일한 AQ Strength를 사용합니다.
  Auto Variance AQ는 프레임마다 AQ Strength를 자동적으로 조절해 주는 모드입니다.
  기본값은 Variance AQ입니다.
  MB-Tree 옵션을 사용하면 Variance AQ가 자동적으로 사용됩니다.
  - Strength : AQ의 강도를 결정하는 옵션입니다. 기본값은 1.0이고 0.5 ~ 1.5 사이의 값이 주로 사용됩니다.

Quantizer Matrices
2), 3)번 과정에서 사용되는 Scaling Factor를 조절하는 옵션입니다.
Scaling Factor는 주파수변환된 계수들마다 양자화의 수준을 조절할 수 있게 만들어 주는 수치입니다.
주파수변환과 연계되어 사용되는 값이기 때문에 주파수변환과 마찬가지로 4x4, 8x8 크기의 매트릭스로 구성됩니다.
기본적으로 H.264/AVC 표준에 정의된 Flat(Flat16) 매트릭스가 사용되고 JVT(Joint Video Team) 매트릭스를 선택하거나
사용자가 직접 지정한 매트릭스를 사용할 수도 있습니다.


Analysis


Motion Estimation
1)번 과정에서 사용되는 움직임예측(Motion Estimation)과 프레임 내 예측 등에 관련된 옵션들입니다.
H.264/AVC 표준은 Inter코딩시 움직임예측에 사용되는 블럭의 크기를 최소 4x4 까지 허용합니다. 16x16 크기의 매크로블럭은
16x8, 8x16, 8x8, 8x4, 4x8, 4x4 크기의 서브 파티션들로 나눠지고 각각의 서브 파티션마다 움직임예측이 수행될 수 있습니다.
Intra코딩시에는 16x16, 8x8, 4x4 크기의 서브 파티션이 선택될 수 있고 서브 파티션마다 프레임 내 예측이
수행되는데 각각 4, 9, 9 가지의 예측 모드가 정의되어 있습니다.
또한 움직임예측시 탐색의 정확도에 따라서 Full-Pel(정수 픽셀 단위), Half-Pel(1/2 픽셀 단위), Quater-Pel(1/4 픽셀 단위)로
나눌 수 있는데 x264는 Full-Pel, Half-Pel, Quater-Pel 순으로 개선해가며 움직임예측을 수행합니다.
종합하면, 움직임예측 및 프레임 내 예측은 코딩에 사용될 서브 파티션의 종류와 그에 맞는 움직임벡터 및 프레임 내 예측 모드를
선택하는 과정이라고 할 수 있습니다.
먼저 서브 파티션의 종류 및 프레임 내 예측 모드를 선택할 때 단순히 예측오류데이터가 가장 작은 종류를 선택하는 방법이 있을 수 있지만
이 방법으로는 작은 서브 파티션(4x4 또는 8x8 등)을 선택했을 때, 코딩해야 할 움직임벡터의 수와 예측 모드의 수가 증가하는 것을 고려하지
못합니다. 마찬가지로 움직임벡터를 선택할 때에도 Quater-Pel을 사용하면 예측오류데이터를 줄일 수는 있겠지만
해당 움직임벡터를 코딩하는 데에 더 많은 비트가 필요하게 되는 것을 고려하지 못합니다.
따라서 인코더는 어떤 선택을 할 때마다 그 선택으로 인한 예측오류데이터와 그 선택을 코딩하는 데에 필요한 비트를 함께
고려해야만 최선의 결정을 할 수 있는데 이를 가능하게 하는 선택 결정 방법이 RDO(Rate-Distortion Optimization)입니다.
RDO는 어떤 선택으로 인한 Distortion(예측오류데이터 등)과 그 선택에 필요한 Rate(비트)를 동시에 고려함으로써
효율적인 모드 결정을 가능하게 합니다.
RDO는 서브 파티션의 종류나 움직임벡터의 선택 외에도 프레임 내 예측 모드 등, 여러가지 대안들 중에서 어떤 선택을
해야 하는 경우에 사용될 수 있는 모드 결정 방법이라고 할 수 있습니다. 다만 정확한 Rate를 구하기 위해서는 훨씬 더 많은
계산이 필요하기 때문에 Non-RDO 모드보다 인코딩 속도는 상당히 느려집니다.
  - Chroma M.E. : 이 옵션에 체크하면 움직임예측시 Chroma 채널의 정보도 함께 계산됩니다.
  특별한 이유가 없다면 사용하는 편이 좋습니다.
  - M.E. Range : M.E. Algorith의 탐색 범위를 결정하는 옵션입니다. 기본값은 16이고 값이 클수록 탐색의 범위가
  넓어지기 때문에 인코딩 속도는 느려집니다. 16 ~ 24 사이의 값이 주로 사용됩니다.
  단, M.E. Algorith에서 Diamond나 Hexagon을 선택할 경우 M.E. Range는 4 ~ 16 으로 제한됩니다.
  - M.E. Algorithm : 움직임예측 방식을 결정하는 옵션입니다.
  예측하려는 블럭과 시간적, 공간적으로 가까이에 있는 블럭들로부터 대강의 탐색 시작 위치를 결정하고
  그 위치에서부터 탐색을 시작합니다. 이 단계에서 사용되는 탐색의 정확도는 Full-Pel입니다.
  기본값은 Hexagon이고 Hexagon과 Multi Hex가 주로 사용됩니다.
  - Subpixel Refinement : Subpixel(Half-Pel, Quater-Pel)단위의 움직임예측과 관련된 옵션입니다.
  01 ~ 05 사이의 값은 Sub-Pel 움직임예측의 강도를 결정하고 00을 선택하면 Sub-Pel 움직임예측은 사용되지 않습니다.
  06부터는 서브 파티션의 종류 선택에 RDO가 사용됩니다. 08부터는 서브 파티션의 종류 선택 외에
  움직임벡터와 프레임 내 예측 모드 선택에도 RDO가 사용됩니다.
  10에서는 매크로블럭의 QP값을 선택할 때에도 RDO가 사용됩니다.
  11에서는 인코딩 속도를 높이기 위해 적용되는 모든 최적화 알고리즘을 사용하지 않습니다.
  10 이상을 적용하려면 AQ와 trellis=2 를 사용해야 합니다.

Extra
  - MV Prediction mode : 1-1)번 과정에서 매크로블럭을 Inter코딩할 때 코딩해야하는 정보로는 예측된 움직임벡터(PMV),
  실제 움직임벡터와의 차이값(MVD), 예측오류데이터라고 볼 수 있습니다. 여기서 PMV가 산출되는 방식은, 주로 주변 블럭들의
  움직임벡터를 이용해서 Median벡터를 구하는 방식인데 B프레임에서는 추가적으로 Direct 예측 방식이 지원됩니다.
  B프레임의 Direct 예측 방식은 Spatial과 Temporal로 나눠지는데 둘 중에서 어떤 방식을 사용할지 결정하는 옵션입니다.
  Spatial은 동일한 프레임 내에 있는 주변 블럭들의 움직임벡터를 이용해서 PMV를 구하는 방식입니다.
  Temporal은 앞, 뒤에 있는 참조프레임에서 동일한 위치에 있는 블럭의 움직임벡터를 이용해서 PMV를 구하는 방식입니다.
  Auto는 두 가지 모드를 적응적으로 사용합니다. 기본값은 Spatial이고 Spatial과 Auto가 주로 사용됩니다.
  x264의 1패스 모드에서는 Auto를 사용해도 적응적인 선택을 제대로 하지 못하고 대부분은 Spatial이 사용됩니다.
  Auto는 멀티패스 모드에서 가장 잘 작동합니다.
  - Trellis : 3)번 과정에서 사용되는 양자화 방식의 하나입니다.
  RDO기반의 양자화 방식이고 사용 빈도에 따라서 Final MB와 Always로 나뉩니다.
  Trellis가 사용되지 않을 때에는 Deadzones가 대신 사용됩니다.
  기본값은 Final MB이고 주로 Final MB와 Always가 사용됩니다.
  Trellis 옵션을 사용하려면 CABAC을 사용해야 합니다.
  - Psy-RD Strength : RDO에 의한 모드 결정에서 단순히 PSNR같은 수치를 높이는 결정보다는 사람의 눈으로 봤을 때 더 좋은
  결과를 보여주는 모드를 결정하도록 조절해 주는 옵션입니다. 기본값은 1.0이고 기본값을 사용하는 편이 좋습니다.
  RDO와 관계되는 옵션이기 때문에 Subpixel Refinement 옵션에서 06 이상의 값을 사용해야 작동합니다.
  - Psy-Trellis Strength : Trellis에 의한 양자화 과정에서 사람의 눈에 더 좋게 보이는 결과가 나오도록 양자화 방식을
  조절해 주는 옵션입니다. 기본값은 0으로 사용되지 않고 사용되는 경우에는 0.0 ~ 0.4 사이의 값이 주로 사용됩니다.
  Trellis와 관계되는 옵션이기 때문에 Trellis 옵션에서 Final MB 또는 Always를 사용해야 작동합니다.
  - No Mixed Reference Frames : 1-1)번 과정에서 Inter코딩시 각각의 서브 파티션들은 독립적으로 움직임예측을 수행합니다.
  따라서 각각의 서브 파티션들은 서로 다른 참조프레임을 사용하는 것이 가능하지만 이 옵션에 체크하면 매크로블럭 내의
  서브 파티션들이 모두 동일한 참조프레임을 사용하도록 제한합니다.
  이 옵션을 사용하면 인코딩 속도를 높여줄 수 있지만 그만큼 압축 효율이 낮아집니다.
  - No DCT Decimation : 1-1)번 과정에서 Inter코딩시 구해진 예측오류데이터는 2)번 주파수변환 과정을 거쳐서 주파수 계수들로
  이루어진 DCT블럭으로 바뀝니다. 이 때, DCT블럭 내의 주파수 계수들이 무시해도 좋을 만큼 작다고 판단되면 해당 DCT블럭의
  모든 주파수 계수들을 0으로 만드는 옵션이 DCT Decimation입니다.
  이렇게 DCT블럭 내의 주파수 계수들을 모두 제거하면 이후의 양자화 과정이나 엔트로피 과정도 생략되기 때문에 인코딩 속도를
  높여줍니다. 또한 예측오류데이터를 코딩하지 않기 때문에 비트를 절약할 수 있습니다.
  제거된 주파수 계수들로 인해 미세한 손실이 있을 수도 있지만 대부분의 경우에 그 차이는 구별하기 힘듭니다.
  기본적으로 DCT Decimation이 사용되며, 이 옵션에 체크하면 사용하지 않게 됩니다.
  - No Fast P-Skip : 1-1)번 과정에서 매크로블럭을 Inter코딩할 때, MVD와 예측오류데이터가 0인 블럭을 Skip블럭이라고 합니다.
  즉, 예측된 움직임벡터가 실제 움직임벡터와 일치하고 예측오류데이터도 없는 경우에 해당 블럭은 Skip블럭으로 코딩되는데
  따로 코딩해야할 움직임 정보가 없기 때문에 Inter코딩 모드 중에서 가장 경제적인 모드라고 할 수 있습니다.
  Fast P-Skip은 P프레임 내의 매크로블럭을 Inter코딩할 때, MVD가 0이면서 예측오류데이터가 일정 수준을 넘지 않으면
  해당 블럭을 Skip블럭으로 코딩하고 이후의 움직임예측 과정을 생략하는 옵션입니다.
  Skip블럭으로 코딩되는 매크로블럭이 많아지기 때문에 인코딩 속도를 높여주지만 부정확한 모드 결정이 있을 수 있습니다.
  기본적으로 Fast P-Skip이 사용되며, 이 옵션에 체크하면 사용하지 않게 됩니다.
  - No Psychovisual Enhancements : x264에서 사용되는 모든 Psychovisul Enhancements(사람의 눈에 최적화된 작동)를 사용하지
  않게 하는 옵션입니다. 특별한 경우가 아니라면 사용하지 않는 편이 좋습니다.
  - Noise Reduction : x264의 압축 과정에서 일정 수준 이하의 주파수 계수를 제거하는 방식으로 노이즈를 줄여주는 옵션입니다.
  압축 과정 내에서 사용되는 만큼 일반적인 AVS필터들보다 속도면에서 훨씬 빠르지만 그만큼 성능이 떨어집니다.
  기본값은 0으로 사용되지 않고 사용되는 경우에는 100 ~ 1000 사이의 값이 주로 사용됩니다.

Macroblocks
  - Partitions : 1-1), 1-2)번 과정에서 움직임예측과 프레임 내 예측시 사용할 서브 파티션의 종류를 결정하는 옵션입니다.
  기본값은 Default로 P4x4를 제외한 모든 서브 파티션이 선택됩니다. Default와 All이 주로 사용됩니다.
  Custom을 선택하면 서브 파티션의 종류를 사용자가 선택할 수 있습니다.
  - Adaptive DCT : 2)번 과정에서 8x8 정수변환과 4x4 정수변환을 선택적으로 사용하는 옵션입니다.
  I8x8을 사용하려면 이 옵션을 사용해야 합니다. High Profile 이상에서만 사용 가능합니다.
  - I8x8, I4x4, P8x8, P4x4, B8x8 : 사용 가능한 서브 파티션의 종류입니다.
  H.264/AVC 표준에서는 B4x4까지도 사용이 가능하게 되어있지만, x264는 P4x4만큼이나 B4x4도 효율적이지
  못하다는 개발자들의 판단에 따라서 B4x4를 사용하지 않고 있습니다.

Blu-Ray
블루레이 스펙에 맞는 영상으로 인코딩할 때 사용되는 옵션들입니다.
특별한 경우가 아니라면 사용되지 않습니다.
  - HRD Info : CBR을 적용하는 경우에는 비트레이트 모드로 인코딩해야 하고 정해진 비트레이트를 맞추기 위한 Filler 데이터가 삽입됩니다.
  - Use Access Unit Delimiters : AUD 정보를 스트림에 입력하는 옵션입니다.
  - Fake Interlaced : 블루레이 스펙은 25p, 30p 영상을 지원하지 않기 때문에 50i 또는 60i로 인코딩해야하는 단점이 있습니다.
  이 옵션에 체크하면 MBAFF가 적용된 인터레이스 영상인 것처럼 플래그를 삽입하지만 실질적인 인코딩은 프로그레시브 방식으로 진행됩니다.
  - Enable Blu-ray compatibility : 블루레이 스펙을 맞추기 위해서 다른 여러가지 옵션들을 조정해 주는 옵션입니다.


Misc


Custom Command Line
MeGUI에서 지원하지 않는 x264의 옵션들을 사용해야 할 때 직접 옵션값을 입력해 줍니다.

Files
  - Logfile : 멀티패스 인코딩의 첫 번째 패스에서 만들어질 .stats파일의 경로를 지정해 주는 옵션입니다.
  - Use qp File : 특정 구간의 프레임 종류와 QP값을 직접 지정해 주는 옵션입니다.
  .qpf파일을 통해서 사용되는데 .qpf파일은 각각의 라인이 프레임 넘버, 프레임 종류, QP값 순으로 이루어진 .txt파일입니다.
  QP값을 -1로 지정하면 x264가 자동적으로 QP값을 선택하며 프레임의 종류는 I, i, K, P, B, b 중에서 선택이 가능합니다.
  각각 IDR프레임, I프레임, 키프레임, P프레임, 참조B프레임, B프레임을 의미합니다.
  키프레임은 Open GOP의 사용 여부에 따라 IDR-I프레임 또는 Recovery Point SEI가 삽입된 I프레임이 적절히 사용됩니다.

V.U.I.
Video Usability Information의 약자로서 인코딩된 스트림에 여러가지 플래그들을 삽입해 주는 옵션입니다.
인코딩된 스트림을 재생할 때 디코더가 해당 플래그를 읽고 플래그가 의도한대로 디코딩하게 만드는 것이 목적이지만
대부분의 소프트웨어 디코더는 이 플래그들을 무시합니다. 거의 사용되지 않는 옵션입니다.
  - Range : 디코딩시 PC Range(0 ~ 255) 또는 TV Range(16 ~ 235)를 사용하도록 표시하는 플래그가 삽입되는 옵션입니다.
  - Force pic_struct : 스트림에 Picture Timing SEI를 삽입해주는 옵션입니다. Open GOP나 인터레이스 인코딩시 자동 적용됩니다.
  - Color Primaries, Transfer, Color Matrix : 디코딩시 YUV<->RGB 변환 방식을 정해주는 옵션입니다.

Input/Output
Input과 Output 사이의 편차를 나타내는 수치인 PSNR과 SSIM을 계산해 주는 옵션입니다.
  - PSNR calculation : 인코딩을 완료한 후에 PSNR 수치를 Log에 표시합니다.
  - SSIM calculation : 인코딩을 완료한 후에 SSIM 수치를 Log에 표시합니다.
  - Stitch able : 스트림 헤더를 간소화함으로써 똑같은 옵션을 사용한 영상이라면 헤더 정보가 일치하도록 만드는 옵션입니다.
  여러개의 파일을 따로 인코딩한 후에 하나로 이어붙이려고 할 때 사용하면 좋은 옵션입니다.
  - Force SAR : 인풋 영상의 SAR(Sample Aspect Ratio)을 정해주는 옵션입니다.

Other
  - Threads (0 = Auto) : 멀티스레딩을 사용하는 경우에 사용할 스레드의 수를 결정하는 옵션입니다.
  기본값은 0으로 x264가 자동으로 스레드의 수를 결정하며 [CPU의 코어 수 * 1.5]가 사용됩니다.
  특별한 이유가 없다면 기본값을 사용하는 편이 좋습니다.
  - Thread-input : 멀티스레딩을 사용하는 경우에 소스의 디코딩을 독립된 스레드에서 작업하게 합니다.
  - Non Deterministic : Threads 값이 1 보다 큰 경우 이 옵션을 사용하면 인코딩 아웃풋이 일정하지 않게 됩니다.
  - Slow first pass : 2패스, 3패스, 4패스 모드 등의 멀티패스 모드에서 사용되는 옵션입니다.
  멀티패스 모드의 첫 번째 패스에서는 .stats파일을 만드는 것이 목적이기 때문에 .stats파일을 만드는 과정에
  크게 영향을 주지 않는 옵션들의 수치를 낮춰 줌으로써 첫 번째 패스의 인코딩 속도를 높여주는 것이 효율적입니다.
  따라서 x264는 자동으로 첫 번째 패스의 옵션들을 아래와 같이 수정해서 인코딩을 수행하는데,
  --ref 1, --no-8x8dct, --partitions none, --me dia, --subme 2, --trellis 0, --fast-pskip
  이 옵션에 체크하면 위와 같은 옵션 조정이 이뤄지지 않고 사용자가 입력한 옵션들이 첫 번째 패스에서도
  그대로 사용됩니다.
  - Fast Decode : x264의 튜닝 옵션으로 --tune fastdecode를 추가합니다.
  - Zero Latency : x264의 튜닝 옵션으로 --tune zerolatency를 추가합니다.

Adjustments
  - Default Settings : 모든 옵션을 x264의 기본값으로 초기화합니다.
  - Preset Settings : 선택된 프리셋에 따라 x264옵션들을 조정합니다.


https://github.com/wasabeef/awesome-android-ui

https://android-arsenal.com/


List of Android UI/UX Libraries

Project status

A curated list of awesome Android UI/UX libraries.

Core Library is here.

Index (light-weight page)

Material

NameLicenseDemo
MaterialDesignLibraryApache License V2      
DrawerArrowDrawableApache License V2
MaterialTabsApache License V2 
PagerSlidingTabStripApache License V2
material-rippleApache License V2
RippleEffectMIT
LDrawerApache License V2
material-design-iconsApache License V2
AndroidMaterialDesignToolbarUnKnown
MaterialEditTextApache License V2
material-menuApache License V2 
material-dialogsApache License V2  
AlertDialogProApache License V2  
MaterialNavigationDrawerApache License V2
MaterialDialogApache License V2 
materialish-progressApache License V2 
FloatingActionButtonMIT
android-floating-action-buttonApache License V2 
snackbarMIT
CircularRevealApache License V2
material-range-barApache License V2 
Lollipop-AppCompat-Widgets-SkeletonApache License V2
CarbonApache License V2NONE
material-calendarviewApache License V2
MaterialApache License V2     

Layout

NameLicenseDemo
WaveViewApache License V2
ResideLayoutApache License V2
AndroidSwipeLayoutMIT 
FreeFlowApache License V2
SwipeBackLayoutApache License V2 
Maskable LayoutApache License V2
ExpandableLayoutMIT
android-PullRefreshLayoutMIT
TileViewMIT 
ShowcaseViewApache License V2 
Ultra Pull To RefreshApache License V2  
AndroidViewHoverUnKnown
DraggablePanelApache License V2 
SlidrApache License V2
Pull-to-Refresh.Rentals-AndroidApache License V2
Pull-to-Refresh.ToursApache License V2
InboxLayoutUnKnown
SwipeBackUnKnown 
ArcLayoutApache License V2
DraggerApache License V2

Button

NameLicenseDemo
circular-progress-buttonApache License V2
android-process-buttonApache License V2 
android-circlebuttonApache License V2
android-flat-buttonApache License V2
MovingButtonMIT
LabelViewApache License V2

List / Grid

NameLicenseDemo
SuperRecyclerViewApache License V2NONE
FlabbyListViewApache License V2 
recyclerview-stickyheadersMIT
ParallaxListViewUnKnown
PullZoomViewApache License V2
SwipeMenuListViewMIT
discrollviewApache License V2
StickyListHeadersApache License V2
ListBuddiesApache License V2 
Android-ObservableScrollViewApache License V2             
AsymmetricGridViewApache License V2 
DynamicGridMIT
AndroidStaggeredGridApache License V2
SwipeListViewApache License V2
android-parallax-recyclerviewApache License V2 
BlurStickyHeaderListViewMIT
RecyclerView AnimatorsApache License V2 
RecyclerView-FlexibleDividerApache License V2 
AndroidTreeViewApache License V2 
RecyclerViewFastScrollerApache License V2 

ViewPager

NameLicenseDemo
ParallaxPagerTransformerUnKnown
ViewPagerTransformsApache License V2
CircleIndicatorMIT
Android ViewPagerIndicatorApache License V2
Android-ParallaxHeaderViewPagerApache License V2
freepagerApache License V2
SpringIndicatorApache License V2
SmartTabLayoutApache License V2

Label / Form

NameLicenseDemo
Shimmer-androidApache License V2
Shimmer for AndroidBSD 2 License
TitanicApache License V2
MatchViewApache License V2
android-autofittextviewApache License V2
SecretTextViewUnKnown
TextJustify-AndroidApache License V2
RoundedLetterViewApache License V2
TextDrawableApache License V2 
BabushkaTextApache License V2
ExpandableTextViewApache License V2
Float Labeled EditTextApache License V2

Image

NameLicenseDemo
TouchImageViewLICENSENONE
CircleImageViewApache License V2
android-shape-imageviewApache License V2 
GifImageViewMIT
cropperApache License V2
android-cropApache License V2
SelectableRoundedImageViewApache License V2
RoundedImageViewApache License V2 
CropImageViewApache License V2

SeekBar

NameLicenseDemo
DiscreteSeekBarApache License V2 

Progress

NameLicenseDemo
SmoothProgressBarApache License V2
NumberProgressBarMIT
CircleProgressUnKnown
android-square-progressbarUnKnown  
GoogleProgressBarApache License V2  
Android-RoundCornerProgressBarApache License V2

Menu

NameLicenseDemo
CircularFloatingActionMenuMIT
AndroidResideMenuMIT
Side-Menu.AndroidApache License V2
Context-Menu.AndroidApache License V2

ActionBar

NameLicenseDemo
FadingActionBarApache License V2
GlassActionBarApache License V2
NotBoringActionBarApache License V2

Dialog

NameLicenseDemo
DialogPlusApache License V2 

Calendar

NameLicenseDemo
CaldroidMIT
android-times-squareApache License V2
Android-MonthCalendarWidgetApache License V2
android-betterpickersApache License V2
Android-Week-ViewApache License V2

Graph

NameLicenseDemo
EazeGraphApache License V2  
hellocharts-androidApache License V2 
MPAndroidChartApache License V2  
WilliamChartApache License V2 

Animation

NameLicenseDemo
AndroidViewAnimationsMIT
ListViewAnimationsApache License V2
AndroidImageSliderMIT
transitions-everywhereApache License V2
Android Ripple BackgroundMIT 
android-flipMIT 
FragmentTransactionExtendedApache License V2 
KenBurnsViewApache License V2
reboundBSD 2 Licensehttp://facebook.github.io/rebound/
ReachabilityApache License V2
AnimationEasingFunctionsMIT
EasyAndroidAnimationsUnKnown
android-pathviewApache License V2
ViewRevealAnimatorApache License V2
ArcAnimatorMIT 
SearchMenuAnimUnKnown

Parallax

NameLicenseDemo
ParallaxEverywhereMIT

Effect

NameLicenseDemo
EtsyBlurApache License V2
BlurDialogFragmentApache License V2 
BlurBehindMIT 
Android StackBlurApache License V2
EdgeEffectOverrideApache License V2

Other

NameLicenseDemo
SwipecardsApache License V2
Android-BootstrapMIT
Android PDFViewGPL V3
DspecApache License V2
LolliPinApache License V2
DrawableViewApache License V2
Material Shadow 9-PatchApache License V2


http://52.11.176.238/localization/


개요

구글 스프레드 시트 ---> 다국어 스트링 파일 생성기 ---> iOS/ Android 바로 적용 가능한 폴더구조로 파일 생성


자세한 내용은 아래 영상을 보시면 좋을 듯 합니다.

GoogleTranslate 를 손쉽게 이용해서 원하는 국가에 배포할 수 있을 뿐 아니라, 언어 담당자들과 개발자간 협업에 큰 도움이 될 것 같습니다.


사용법 보기

https://youtu.be/1vdiJwBh4ug


https://github.com/PhilJay/MPAndroidChart


Remember: It's all about the looks.

alt tag

MPAndroidChart is a powerful & easy to use chart library for Android, supporting line-, bar-, scatter-, candlestick-, pie- and radarcharts (spider web), as well as scaling, dragging (panning), selecting and animations. Works on Android 2.2 (API level 8) and upwards.

An iOS version of this library is now available, go check it out: ios-charts

Donations

This project needs you! If you would like to support this project's further development, the creator of this project or the continuous maintenance of this project, feel free to donate. Your donation is highly appreciated (and I love food, coffee and beer). Thank you!

PayPal

  • Donate 5 $: Thank's for creating this project, here's a coffee (or some beer) for you!
  • Donate 10 $: Wow, I am stunned. Let me take you to the movies!
  • Donate 15 $: I really appreciate your work, let's grab some lunch!
  • Donate 25 $: That's some awesome stuff you did right there, dinner is on me!
  • Donate 50 $: I really really want to support this project, great job!
  • Donate 100 $: You are the man! This project saved me hours (if not days) of struggle and hard work, simply awesome!
  • Donate 300 $: I can afford it and want to assure the further development and maintenance of this project. Furthermore, I also want to show my gratitude to it's creator.
  • Of course, you can also choose what you want to donate, all donations are awesome!

Spread the word


Demo

For a brief overview of the most important features, please download the PlayStore DemoMPAndroidChart Example.apk and try it out. The corresponding code for the demo-application is also included in this repository inside the MPChartExample folder.

ScreenShot

Questions & Issues

If you are having questions or problems, you should:

  • Make sure you are using the latest version of the library. Check the release-section.
  • Study the Documentation-Wiki
  • Search or open questions on stackoverflow with the mpandroidchart tag
  • Search known issues for your problem (open and closed)
  • Create new issues (please search known issues before, do not create duplicate issues)

Features

Core features:

  • Scaling on both axes (with touch-gesture, axes separately or pinch-zoom)
  • Dragging / Panning (with touch-gesture)
  • Combined-Charts (line-, bar-, scatter-, candle-data)
  • Dual (separate) Y-Axis
  • Finger drawing (draw values into the chart with touch-gesture)
  • Highlighting values (with customizeable popup-views)
  • Multiple / Separate Axes
  • Save chart to SD-Card (as image, or as .txt file)
  • Predefined color templates
  • Legends (generated automatically, customizeable)
  • Customizeable Axes (both x- and y-axis)
  • Animations (build up animations, on both x- and y-axis)
  • Limit lines (providing additional information, maximums, ...)
  • Fully customizeable (paints, typefaces, legends, colors, background, gestures, dashed lines, ...)
  • Smooth zooming and scrolling for up to 30.000 data points in Line- and BarChart

Chart types:

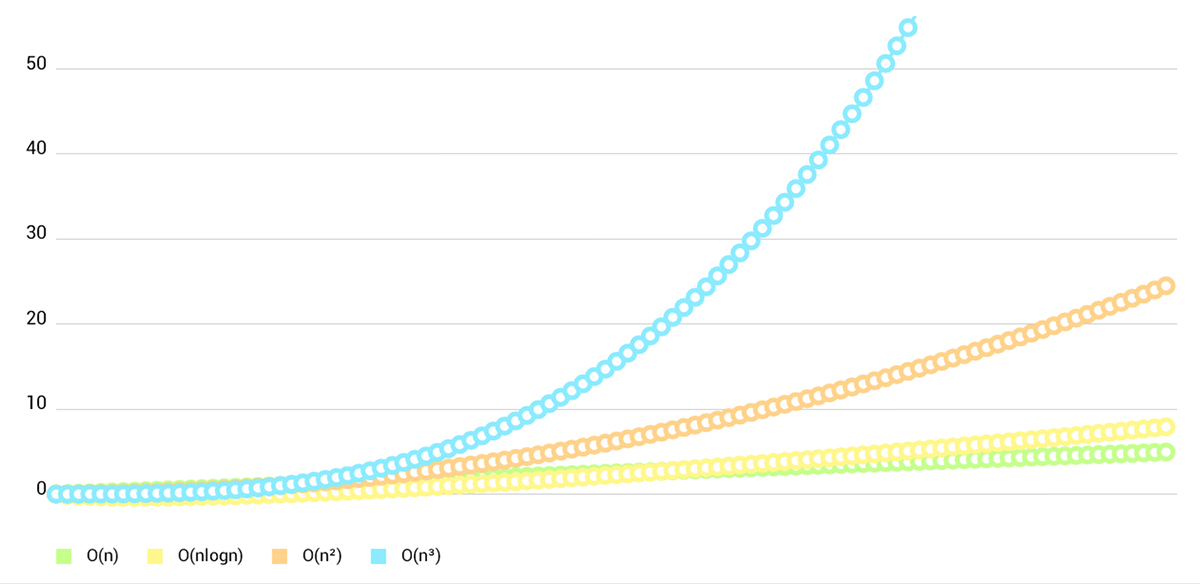
  • LineChart (with legend, simple design) alt tag
  • LineChart (with legend, simple design) alt tag

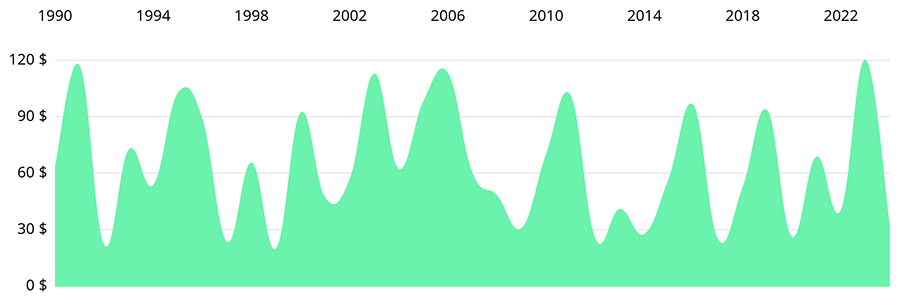
  • LineChart (cubic lines) alt tag

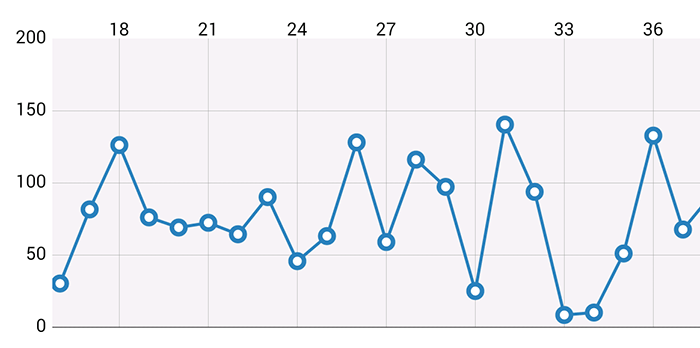
  • LineChart (single DataSet) alt tag

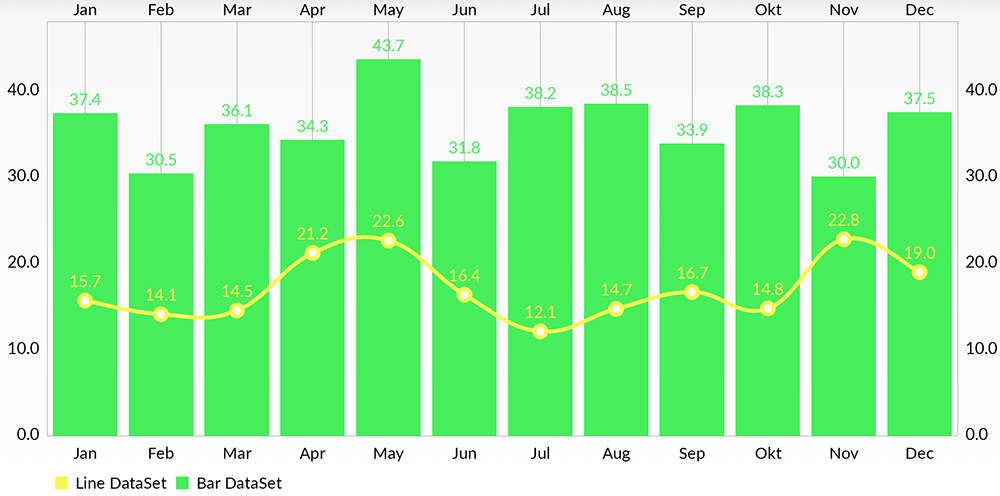
  • Combined-Chart (bar- and linechart in this case) alt tag

  • BarChart (with legend, simple design)

alt tag

  • BarChart (grouped DataSets)

alt tag

  • Horizontal-BarChart

alt tag

  • PieChart (with selection, ...)

alt tag

  • ScatterChart (with squares, triangles, circles, ... and more)

alt tag

  • CandleStickChart (for financial data)

alt tag

  • RadarChart (spider web chart)

alt tag

Usage

In order to use the library, there are 4 options:

1. Gradle dependency

  • Add the following to your build.gradle:

    repositories {
        maven { url "https://jitpack.io" }
    }
    
    dependencies {
        compile 'com.github.PhilJay:MPAndroidChart:v2.0.8'
    }

2. Maven

  • Add the following to your pom.xml:

    <repository>
        <id>jitpack.io</id>
        <url>https://jitpack.io</url>
    </repository>
    
    <dependency>
        <groupId>com.github.PhilJay</groupId>
        <artifactId>MPAndroidChart</artifactId>
        <version>v2.0.8</version>
    </dependency>

3. jar file only

  • Download the latest .jar file from the releases section
  • Copy the mpandroidchartlibrary-.jar file into the libs folder of your Android application project
  • Start using the library

4. clone whole repository

  • Open your commandline-input and navigate to your desired destination folder (where you want to put the library)
  • Use the command git clone https://github.com/PhilJay/MPAndroidChart.git to download the full MPAndroidChart repository to your computer (this includes the folder of the library project as well as the example project)
  • Import the library folder (MPChartLib) into your Eclipse workspace
  • Add it as a reference to your project: referencing library projects in Eclipse

Documentation

For a detailed documentation, please have a look at the Wiki.

Furthermore, you can also rely on the MPChartExample folder and check out the example code in that project. The corresponding application to the example project is also available in the Google PlayStore.

You have a problem that cannot be solved by having a look at the example project and documentation? No problem, let's talk: Gitter

License

Copyright 2015 Philipp Jahoda

Licensed under the Apache License, Version 2.0 (the "License"); you may not use this file except in compliance with the License. You may obtain a copy of the License at

http://www.apache.org/licenses/LICENSE-2.0

Unless required by applicable law or agreed to in writing, software distributed under the License is distributed on an "AS IS" BASIS, WITHOUT WARRANTIES OR CONDITIONS OF ANY KIND, either express or implied. See the License for the specific language governing permissions and limitations under the License.

Special thanks to mikegrph1lb4 and jitpack.io for their contributions to this project.


Introductory concepts

To begin, I should explain some introductory concepts related to H.264 video.

What is H.264?

H.264 is a video compression standard known as MPEG-4 Part 10, or MPEG-4 AVC (for "advanced video coding"). It's a joint standard promulgated by the ITU-T Video Coding Experts Group (VCEG) and the ISO/IEC Moving Picture Experts Group (MPEG).

H.264's audio sidekick is AAC (advanced audio coding), which is designated MPEG-4 Part 3. Both H.264 and AAC are technically MPEG-4 codecs—though it's more accurate to call them by their specific names—and compatible bitstreams should conform to the requirements of Part 14 of the MPEG-4 spec.

According to Part 14, MPEG-4 files containing both audio and video, including those with H.264/AAC, should use the .mp4 extension, while audio-only files should use .m4a and video-only files should use .m4v. Different vendors have adopted a range of extensions that are recognized by their proprietary players, such as Apple with .m4p for files using FairPlay Digital Rights Management and .m4r for iPhone ringtones. (Mobile phones use the .3gp and .3g2 extensions, though I don't discuss producing for mobile phones in this article.)

Like MPEG-2, H.264 uses three types of frames, meaning that each group of pictures (GOP) is comprised of I-, B-, and P-frames, with I-frames like the DCT-based compression used in DV and B- and P-frames referencing redundancies in other frames to increase compression. I'll cover much more on this later in this article.

Like most video coding standards, H.264 actually standardizes only the "central decoder...such that every decoder conforming to the standard will produce similar output when given an encoded bitstream that conforms to the constraints of the standard," according to Overview of the H.264/AVC Video Coding Standard published in IEEE Transactions on Circuits and Systems for Video Technology (ITCSVT). Basically, this means that there's no standardized H.264 encoder. In fact, H.264 encoding vendors can utilize a range of different techniques to optimize video quality, so long as the bitstream plays on the target player. This is one of the key reasons that H.264 encoding interfaces vary so significantly among the various tools.

Will there be royalties?

If you stream H.264 encoded video after December 31, 2010, there may be an associated royalty obligation. As yet, however, it's undefined and uncertain. Here's an overview of what's known about royalties to date.

Briefly, H.264 was developed by a group of patent holders now represented by the MPEG Licensing Suthoring, or MPEG-LA for short. According to the Summary of AVC/H.264 License Terms (PDF, 34K) you can download from the MPEG-LA site, there are three classes of video producers subject to a potential royalty obligation.

If you're in the first two classes, and are either distributing via pay-per-view or subscription, you may already owe MPEG-LA royalties. The third group, which is clearly the largest, is for free Internet broadcast. Here, there will be no royalties until December 31, 2010 (source: AVC/H.264 License Agreement). After that, "the royalty shall be no more than the economic equivalent of royalties payable during the same time for free television."

According to their website, MPEG-LA must disclose licensing terms at least one year before they become due, or no later than December 31, 2009. Until then, we're unfortunately in the dark as to which uses of H.264 video will incur royalties, and the extent of these charges. For more information on H.264-related royalties, check out my article, The Future's So Bright: H.264 Year in Review, at StreamingMedia.com.

H.264 and Flash Player

As I mentioned, Adobe added H.264 playback support to Adobe Flash Player 9 Update 3 back in 2007. The apparent goal was to support the widest possible variation of files containing H.264 encoded video, and Flash Player should play.mp4, .m4v, .m4a, .mov, and .3gp files, H.264 files using the .flv extension, as well as files using the newer extensions that were released along with Flash Player 9 (see Table 1).

Table 1. File extensions for H.264 files produced for Flash Player playback

File ExtensionFTYPMIME TypeDescription
.f4v'F4V 'video/mp4Video for Flash Player
.f4p'F4P 'video/mp4Protected media for Flash Player
.f4a'F4A 'audio/mp4Audio for Flash Player
.f4b'F4B 'audio/mp4Audio book for Flash Player

I'll describe profiles and levels in the next section. For now, understand that Flash Player supports the Baseline, Main, High, and High 10 H.264 profiles with no levels excluded. Accordingly, when you're producing H.264 video for Flash Player, you're free to choose the most advanced profile supported by the encoding tool, which is typically the High profile. On the audio side, Flash Player can play AAC Main, AAC Low Complexity, and AAC SBR (spectral band replication), which is otherwise known as High-Efficiency-AAC, or HE-AAC.

Producing H.264 video

You have seen that you have nearly complete flexibility regarding profiles and extensions; what else do you need to know before you dig into the details? A couple of things.

First, unlike VP6, which is available only from On2, there are multiple suppliers of H.264 codecs, including MainConcept, whose codec Adobe uses in Adobe Media Encoder and Adobe Flash Media Encoding Server. I've compared the quality of H.264 files produced with H.264 codecs from other vendors, and MainConcept has proven to be the best.

In general, while the overall quality of other codecs has improved, there are some tools to avoid out there. If you're producing with a different tool and not achieving the quality you were hoping for, try encoding with one of the Adobe tools.

Second, some older encoding tools do not offer output directly into F4V format. If F4V format is not offered in your encoding tool, the best alternative is to produce an MPEG-4 compatible streaming media file using the .mp4 extension.

With this as background, I'll describe the most common H.264 encoding parameters.

H.264 encoding parameters

Though H.264 codecs come from different vendors, they use the same general encoding techniques and typically present similar encoding options. Here I review the most common H.264 encoding options.

Understanding profiles and levels

According to the aforementioned article, Overview of the H.264/AVC Video Coding Standard, a profile "defines a set of coding tools or algorithms that can be used in generating a conforming bitstream, whereas a level "places constraints on certain key parameters of the bitstream." In other words, a profile defines specific encoding techniques that you can or can't utilize when encoding the files (such as B-frames), while the level defines details such as the maximum resolutions and data rates.

Take a look at Figure 1, which is a filtered screen capture of a features table from Wikipedia's description of H.264. On top are H.264 profiles, including the Baseline, Main, High, and High 10 profiles that Flash Player supports. On the left are the different encoding techniques available, with the table detailing those supported by the respective profiles.

Encoding techniques enabled by profile (source: Wikipedia)
Figure 1. Encoding techniques enabled by profile (source: Wikipedia)

As you would guess, the higher-level profiles use more advanced encoding algorithms and produce better quality (see Figure 2). To produce this comparison, I encoded the same source file to the same encoding parameters. The file on the left uses the Main Profile; the files on the right uses the Baseline. A quick check of the chart in Figure 1 reveals that the Main Profile enables B slices (also called B-frames) and the higher-quality CABAC encoding, which I define later in this article. As you can see, these do help the Main Profile deliver higher-quality video than the Baseline.

File encoded using the Main profile (left) retaining much more quality than a file encoded using the Baseline profile (right)
Figure 2. File encoded using the Main profile (left) retaining much more quality than a file encoded using the Baseline profile (right)

So, the Main and High profiles deliver better quality than the Baseline Profile; what's the catch? The catch is, as you use more advanced encoding techniques, the file becomes more difficult to decompress, and may not play smoothly on older, slower computers.

This observation illustrates one of the two trade-offs typically presented by H.264 encoding parameters. One trade-off is better quality for a file that is harder to decompress. The other trade-off is a parameter that delivers better quality at the expense of encoding time. In some rare instances, as with the decision to include B-frames in the stream, you trigger both trade-offs, increasing both decoding complexity and encoding time.

To return to profiles: At a high level, think about profiles as a convenient point of agreement for device manufacturers and video producers. Mobile phone vendor A wants to build a phone that can play H.264 video but needs to keep the cost, heat, and size requirements down. So the crafty chief of engineering searches and finds the optimal processor that's powerful enough to play H.264 files produced to the Baseline Profile. If you're a video producer seeking to create video for that device, you know that if you encode using the Baseline profile, the video will play.

Accordingly, when producing H.264 video, the general rule is to use the maximum profile supported by the target playback platform, since that delivers the best quality at any given data rate. If producing for mobile devices, this typically means the Baseline Profile, but check the documentation for that device to be sure. If producing for Flash Player consumption on Windows or Macintosh computers, this means the High Profile.

This sounds nice and tidy, but understand this: While encoding using the Baseline Profile ensures smooth playback on your target mobile device, using the High Profile for files bound for computer playback doesn't provide the same assurance. That's because the High Profile supports H.264 video produced at a maximum resolution of 4096 × 2048 pixels and a data rate of 720 Mbps. Few desktop computers could display a complete frame, much less play back that stream at 30 frames per second.

Accordingly, while producing for devices is all about profile, producing for computers is all about your video configuration. Here, the general rule is that decoding H.264 video is about as computationally intense as VP6—or Windows Media, for that matter. So long as you produce your H.264 video at a similar resolution and data rate as the other two codecs, it should play fine on the same class of computer. (For comparative playback statistics for H.264, VP6 and VC-1, check out my StreamingMedia.com article, Decoding the Truth About Hi-Def Video Production.)

In general, this means that as long as you're producing SD video at 640 × 480 resolution and lower, it should play fine on most post–2003 computers. If you're producing at 720p or higher, these streams won't play smoothly on many of these computers. You should consider offering an alternative SD stream for these viewers.

What about H.264 levels? If producing for mobile devices with limited screen resolution and bandwidth, you also have to choose the correct level, which again should be specified by the device manufacturer. However, since Flash Player can handle any level supported by any of the supported profiles, you don't have to worry about levels when producing for Flash Player playback on a personal computer.

Entropy coding

When you select the Main or High Profiles, some encoding tools will give you two options for entropy coding mode (see Figure 3):

  • CAVLC: Context-based adaptive variable-length coding
  • CABAC: Context-based adaptive binary arithmetic coding

Of the two, CAVLC is the lower-quality, easier-to-decode option, while CABAC is the higher-quality, harder-to-decode option.

Your entropy coding choices: CABAC and CAVLC
Figure 3. Your entropy coding choices: CABAC and CAVLC

Though results are source-dependent, CABAC is generally regarded as being between 5–15% more efficient than CAVLC. This means that CABAC should deliver equivalent quality at a 5–15% lower data rate, or better quality at the same data rate. In my own tests, CABAC produced noticeably better quality, though only in HD test clips encoding to very low data rates. This is shown in Figure 4, from a 720p file produced with CABAC on the left and CAVLC on the right, both to the same 800 kbps video data rate. Figure 4 shows a portion of a frame cut from a 16:9 720p video. Now 800 kbps is very low for 720p footage; by way of comparison, YouTube encodes H.264 720p footage at 2 Mbps, over 2.5 times the data rate.

720p file produced using CABAC on the left, CAVLC on the right
Figure 4. 720p file produced using CABAC on the left, CAVLC on the right

Though neither image would win an award for clarity, the ballerina's face and other details are clearly more visible on the left. The bottom line is that CABAC should deliver better quality, however modest the difference. Now the question becomes, How much harder is the file to decompress and play?

Not that much, it turns out. I tested this on two of the less-powerful multiple-core computers in my office, one a Hewlett-Packard notebook with a Core 2 Duo processor, and the other a Power PC-based Apple PowerMac. As you can see in Table 2, the CABAC file increased the CPU load by less than 1% on the HP notebook, and less than 2% on the Mac. Based on the improved quality and minimal difference in the required playback CPU, I recommend choosing CABAC whenever the option is available.

Table 2. CPU consumed when playing back H.264 files encoded using CABAC and CAVLC

ComputerCABACCAVLCDifference
HP Compaq 8710w Mobile Workstation – 
Core 2 duo
31.1%30.5%0.6%
Apple PowerMac – Dual 2.7 GHz PPC G535.533.71.8%

I, P, and B-frames

It's common knowledge that talking-head footage, where very little changes from frame to frame, encodes at higher quality than dynamic, motion-filled video. That's because H.264, like all high-quality motion codecs, is designed to take advantage of redundancies between video frames. The more redundancy, the higher the quality at any given bit rate.

To leverage this redundancy, H.264 streams include three types of frames (see Figure 5):

  • I-frames: Also known as key frames, I-frames are completely self-referential and don't use information from any other frames. These are the largest frames of the three, and the highest-quality, but the least efficient from a compression perspective.
  • P-frames: P-frames are "predicted" frames. When producing a P-frame, the encoder can look backwards to previous I or P-frames for redundant picture information. P-frames are more efficient than I-frames, but less efficient than B-frames.
  • B-frames: B-frames are bi-directional predicted frames. As you can see in Figure 5, this means that when producing B-frames, the encoder can look both forwards and backwards for redundant picture information. This makes B-frames the most efficient frame of the three. Note that B-frames are not available when producing using H.264's Baseline Profile.
I, P, and B-frames in an H.264-encoded stream
Figure 5. I, P, and B-frames in an H.264-encoded stream

Now that you know the function of each frame type, I'll show you how to optimize their usage.

Working with I-frames

Though I-frames are the least efficient from a compression perspective, they do perform two invaluable functions. First, all playback of an H.264 video file has to start at an I-frame because it's the only frame type that doesn't refer to any other frames during encoding.

Since almost all streaming video may be played interactively, with the viewer dragging a slider around to different sections, you should include regular I-frames to ensure responsive playback. This is true when playing a video streamed from Flash Media Server, or one distributed via progressive download. While there is no magic number, I typically use an I-frame interval of 10 seconds, which means one I-frame every 300 frames when producing at 30 frames per second (and 240 and 150 for 24 fps and 15 fps video, respectively).

The other function of an I-frame is to help reset quality at a scene change. Imagine a sharp cut from one scene to another. If the first frame of the new scene is an I-frame, it's the best possible frame, which is a better starting point for all subsequent P and B-frames looking for redundant information. For this reason, most encoding tools offer a feature called "scene change detection," or "natural key frames," which you should always enable.

Figure 6 shows the I-frame related controls from Flash Media Encoding Server. You can see that Enable Scene Change detection is enabled, and that the size of the Coded Video Sequence is 300, as in 300 frames. This would be simpler to understand if it simply said "I-frame interval," but it's easy enough to figure out.

I-frame related controls from Flash Media Encoding Server
Figure 6. I-frame related controls from Flash Media Encoding Server

Specifically, the Coded Video Sequence refers to a "Group of Pictures" or GOP, which is the building block of the H.264 stream—that is, each H.264 stream is composed of multiple GOPs. Each GOP starts with an I-frame and includes all frames up to, but not including, the next I-frame. By choosing a Coded Video Sequence size of 300, you're telling Flash Media Encoding Server to create a GOP of 300 frames, or basically the same as an I-frame interval of 300.

IDR frames

I'll describe the Number of B-Pictures setting further on, and I've addressed Entropy Coding Mode already; but I wanted to explain the Minimum IDR interval and IDR frequency. I'll start by defining an IDR frame.

Briefly, the H.264 specification enables two types of I-frames: normal I-frames and IDR frames. With IDR frames, no frameafter the IDR frame can refer back to any frame before the IDR frame. In contrast, with regular I-frames, B and P-frames located after the I-frame can refer back to reference frames located before the I-frame.

In terms of random access within the video stream, playback can always start on an IDR frame because no frame refers to any frames behind it. However, playback cannot always start on a non-IDR I-frame because subsequent frames may reference previous frames.

Since one of the key reasons to insert I-frames into your video is to enable interactivity, I use the default setting of 1, which makes every I-frame an IDR frame. If you use a setting of 0, only the first I-frame in the video file will be an IDR frame, which could make the file sluggish during random access. A setting of 2 makes every second I-frame an IDR frame, while a setting of 3 makes every third I-frame an IDR frame, and so on. Again, I just use the default setting of 1.

Minimum IDR interval defines the minimum number of frames in a group of pictures. Though you've set the Size of Codec Video Sequence at 300, you also enabled Scene Change Detection, which allows the encoder to insert an I-frame at scene changes. In a very dynamic MTV-like sequence, this could result in very frequent I-frames, which could degrade overall video quality. For these types of videos, you could experiment with extending the minimum IDR interval to 30–60 frames, to see if this improved quality. For most videos, however, the default interval of 1 provides the encoder with the necessary flexibility to insert frequent I-Frames in short, highly dynamic periods, like an opening or closing logo. For this reason, I also use the default option of 1 for this control.

Working with B-frames

B-frames are the most efficient frames because they can search both ways for redundancies. Though controls and control nomenclature varies from encoder to encoder, the most common B-frame related control is simply the number of B-frames, or "B-Pictures" as shown in Figure 6. Note that the number in Figure 6 actually refers to the number of B-frames between consecutive I-frames or P-frames.

Using the value of 2 found in Figure 6, you would create a GOP that looks like this:

IBBPBBPBBPBB...

...all the way to frame 300. If the number of B-Pictures was 3, the encoder would insert three B-frames between each I-frame and/or P-frame. While there is no magic number, I typically use two sequential B-frames.

How much can B-frames improve the quality of your video? Figure 7 tells the tale. By way of background, this is a frame at the end of a very-high-motion skateboard sequence, and also has significant detail, particularly in the fencing behind the skater. This combination of high motion and high detail is unusual, and makes this frame very hard to encode. As you can see in the figure, the video file encoded using B-frames retains noticeably more detail than the file produced without B-frames. In short, B-frames do improve quality.

File encoded with B-frames (left) and no B-frames (right)
Figure 7. File encoded with B-frames (left) and no B-frames (right)

What's the performance penalty on the decode side? I ran a battery of cross-platform tests, primarily on older, lower-power computers, measuring the CPU load required to play back a file produced with the Baseline Profile (no B-frames), and a file produced using the High Profile with B-frames. The maximum differential that I saw was 10 percent, which isn't enough to affect my recommendation to always use the High Profile except when producing for devices that support only the Baseline Profile.

Advanced B-frame options

Adobe Flash Media Encoding Server also includes the B and P-frame related controls shown in Figure 8. Adaptive B-frame placement allows the encoder to override the Number of B-Pictures value when it will enhance the quality of the encoded stream; for instance, when it detects a scene change and substitutes an I-frame for the B. I always enable this setting.

Other B-frame related options
Figure 8. Other B-frame related options

Reference B-Pictures lets the encoder to use B-frames as a reference frame for P frames, while Allow pyramid B-frame coding lets the encoder use B-frames as references for other B-frames. I typically don't enable these options because the quality difference is negligible, and I've noticed that these options can cause playback to become unstable in some environments.

Reference frames is the number of frames that the encoder can search for redundancies while encoding, which can impact both encoding time and decoding complexity; that is, when producing a B-frame or P-frame, if you used a setting of 10, the encoder would search until it found up to 10 frames with redundant information, increasing the search time. Moreover, if the encoder found redundancies in 10 frames, each of those frames would have to be decoded and in memory during playback, which increases decode complexity.

Intuitively, for most videos, the vast majority of redundancies are located in the frames most proximate to the frame being encoded. This means that values in excess of 4 or 5 increase encoding time while providing little value. I typically use a value of 4.

Finally, though it's not technically related to B-frames, consider the number of Slices per picture, which can be 1, 2, or 4. At a value of 4, the encoder divides each frame into four regions and searches for redundancies in other frames only within the respective region. This can accelerate encoding on multicore computers because the encoder can assign the regions to different cores. However, since redundant information may have moved to a different region between frames—say in a panning or tilting motion—encoding with multiple slices may miss some redundancies, decreasing the overall quality of the video.

In contrast, at the default value of 1, the encoder treats each frame as a whole, and searches for redundancies in the entire frame of potential reference frames. Since it's harder to split this task among multiple cores, this setting is slower, but also maximizes quality. Unless you're in a real hurry, I recommend the default value of 1.

Other encoding parameters

Once you get beyond I and B-frame related controls, H.264 enables a range of additional encoding parameters, as I will soon describe. To put these in perspective, I would estimate that all the options described up to this point account for 90-95% of the quality available in H.264. The settings discussed in this section can deliver only the remaining 5%, which means that most users can accept the defaults without noticing the difference. Still, if you want to try to eke out the ultimate in H.264 quality,you can use the functions that the settings shown in Figure 9 control.

Other H.264 encoding parameters available in Flash Media Encoding Server
Figure 9. Other H.264 encoding parameters available in Flash Media Encoding Server

First is search shape, which can be either 16 × 16 or 8 × 8. The latter (8 × 8) is the higher-quality option, with the trade-off being longer encoding time. The next three "fast" options allow you to speed encoding time at the possible cost of quality. I typically disable these options.

Adaptive Quantization Mode and Quantization Strength are advanced settings that reallocate bits of data within a frame using one of the three selected criteria: brightness, contrast, or complexity. I would only experiment with these settings when areas in the video frame are noticeably blocky. Unfortunately, operation is extremely content-specific, which makes it impossible to offer general advice regarding which techniques and values to use.

Both the rate distortion optimization and Hadamard transformation settings can improve quality but lengthen encoding time; I usually enable both. Finally, the Motion estimation subpixel mode defines the granularity of the search for redundancies: Quarter pixel represents the highest-quality option, though the slowest to encode, and Full pixel represents the fastest but lowest quality. In my low-volume environment, I always use the Quarter pixel option.


Frame-type options:

    --keyint <integer> (x264)
    -g <integer> (FFmpeg)
    Keyframe interval, also known as GOP length. This determines the maximum distance between I-frames. Very high GOP lengths will result in slightly more efficient compression, but will make seeking in the video somewhat more difficult. Recommended default: 250

    --min-keyint <integer> (x264)
    -keyint_min <integer> (FFmpeg) 
    Minimum GOP length, the minimum distance between I-frames. Recommended default: 25

    --scenecut <integer> (x264)
    -sc_threshold <integer> (FFmpeg)
    Adjusts the sensitivity of x264's scenecut detection. Rarely needs to be adjusted. Recommended default: 40

    --pre-scenecut (x264)
    none (FFmpeg)
    Slightly faster (but less precise) scenecut detection. Normal scenecut detection decides whether a frame is a scenecut after the frame is encoded, and if so then re-encodes the frame as an I-frame. This is not compatible with threading, however, and so --pre-scenecut is automatically activated when multiple encoding threads are used.

    --bframes <integer> (x264)
    -bf <integer> (FFmpeg)
    B-frames are a core element of H.264 and are more efficient in H.264 than any previous standard. Some specific targets, such as HD-DVD and Blu-Ray, have limitations on the number of consecutive B-frames. Most, however, do not; as a result, there is rarely any negative effect to setting this to the maximum (16) since x264 will, if B-adapt is used, automatically choose the best number of B-frames anyways. This parameter simply serves to limit the max number of B-frames. Note that Baseline Profile, such as that used by iPods, does not support B-frames. Recommended default: 16

    --b-adapt <integer> (x264)
    -b_strategy <integer> (FFmpeg)
    x264, by default, adaptively decides through a low-resolution lookahead the best number of B-frames to use. It is possible to disable this adaptivity; this is not recommended. Recommended default: 1

    0: Very fast, but not recommended. Does not work with pre-scenecut (scenecut must be off to force off b-adapt).

    1: Fast, default mode in x264. A good balance between speed and quality.

    2: A much slower but more accurate B-frame decision mode that correctly detects fades and generally gives considerably better quality. Its speed gets considerably slower at high bframes values, so its recommended to keep bframes relatively low (perhaps around 3) when using this option. It also may slow down the first pass of x264 when in threaded mode.

    --b-bias 0 (x264)
    -bframebias 0 (FFmpeg)
    Make x264 more likely to choose higher numbers of B-frames during the adaptive lookahead. Not generally recommended. Recommended default: 0

    --b-pyramid (x264)
    -flags2 +bpyramid (FFmpeg)
    Allows B-frames to be kept as references. The name is technically misleading, as x264 does not actually use pyramid coding; it simply adds B-references to the normal reference list. B-references get a quantizer halfway between that of a B-frame and P-frame. This setting is generally beneficial, but it increases the DPB (decoding picture buffer) size required for playback, so when encoding for hardware, disabling it may help compatibility.

    --no-cabac (x264)
    -coder 0 (FFmpeg) 
    CABAC is the default entropy encoder used by x264. Though somewhat slower on both the decoding and encoding end, it offers 10-15% improved compression on live-action sources and considerably higher improvements on animated sources, especially at low bitrates. It is also required for the use of trellis quantization. Disabling CABAC may somewhat improve decoding performance, especially at high bitrates. CABAC is not allowed in Baseline Profile. Recommended default: -coder 1 (CABAC enabled)

    --ref <integer> (x264) 
    -refs <integer> (FFmpeg)
    One of H.264's most useful features is the abillity to reference frames other than the one immediately prior to the current frame. This parameter lets one specify how many references can be used, through a maximum of 16. Increasing the number of refs increases the DPB (Decoded Picture Buffer) requirement, which means hardware playback devices will often have strict limits to the number of refs they can handle. In live-action sources, more reference have limited use beyond 4-8, but in cartoon sources up to the maximum value of 16 is often useful. More reference frames require more processing power because every frame is searched by the motion search (except when an early skip decision is made). The slowdown is especially apparent with slower motion estimation methods. Recommended default: -refs 6

    --no-deblock (x264) 
    -flags -loop (FFmpeg)
    Disable loop filter. Recommended default: -flags +loop (Enabled)

    --deblock <alpha:beta> (x264) 
    -deblockalpha <integer> (FFmpeg)
    -deblockbeta <integer> (FFmpeg)
    One of H.264's main features is the in-loop deblocker, which avoids the problem of blocking artifacts disrupting motion estimation. This requires a small amount of decoding CPU, but considerably increases quality in nearly all cases. Its strength may be raised or lowered in order to avoid more artifacts or keep more detail, respectively. Deblock has two parameters: alpha (strength) and beta (threshold). Recommended defaults:-deblockalpha 0 -deblockbeta 0 (Must have '-flags +loop')

    --interlaced (x264)
    none(FFmpeg)
    Enables interlaced encoding. x264's interlaced encoding is not as efficient as its progressive encoding; consider deinterlacing for maximum effectiveness.

Ratecontrol:

    --qp <integer> (x264)
    -cqp <integer> (FFmpeg)
    Constant quantizer mode. Not exactly constant completely--B-frames and I-frames have different quantizers from P-frames. Generally should not be used, since CRF gives better quality at the same bitrate.

    --bitrate <integer> (x264)
    -b <integer> (FFmpeg)
    Enables target bitrate mode. Attempts to reach a specific bitrate. Should be used in 2-pass mode whenever possible; 1-pass bitrate mode is generally the worst ratecontrol mode x264 has.

    --crf <float> (x264)
    -crf <float> (FFmpeg)
    Constant quality mode (also known as constant ratefactor). Bitrate corresponds approximately to that of constant quantizer, but gives better quality overall at little speed cost. The best one-pass option in x264.

    --vbv-maxrate <integer> (x264)
    -maxrate <integer> (FFmpeg)
    Specifies the maximum bitrate at any point in the video. Requires the VBV buffersize to be set. This option is generally used when encoding for a piece of hardware with bitrate limitations.

    --vbv-bufsize <integer> (x264)
    -bufsize <integer> (FFmpeg)
    Depends on the profile level of the video being encoded. Set only if you're encoding for a hardware device.

    --vbv-init <float> (x264)
    -rc_init_occupancy <float> (FFmpeg)
    Initial VBV buffer occupancy. Note: Don't mess with this.

    --qpmin <integer> (x264)
    -qmin <integer> (FFmpeg)
    Minimum quantizer. Doesn't need to be changed. Recommended default: -qmin 10

    --qpmax <integer> (x264)
    -qmax <integer> (FFmpeg)
    Maximum quantizer. Doesn't need to be changed. Recommended default: -qmax 51

    --qpstep <integer> (x264)
    -qdiff <integer> (FFmpeg)
    Set max QP step. Recommended default: -qdiff 4

    --ratetol <float> (x264)
    -bt <float> (FFmpeg)
    Allowed variance of average bitrate

    --ipratio <float> (x264)
    -i_qfactor <float> (FFmpeg)
    Qscale difference between I-frames and P-frames. Note: -i_qfactor is handled a little differently than --ipratio. Recommended: -i_qfactor 0.71

    --pbratio <float> (x264)
    -b_qfactor <float> (FFmpeg)
    Qscale difference between P-frames and B-frames.

    --chroma-qp-offset <integer> (x264)
    -chromaoffset <integer> (FFmpeg)
    QP difference between chroma and luma.

    --aq-strength <float> (x264)
    none (FFmpeg)
    Adjusts the strength of adaptive quantization. Higher values take more bits away from complex areas and edges and move them towards simpler, flatter areas to maintain fine detail. Default: 1.0

    --pass <1,2,3> (x264)
    -pass <1,2,3> (FFmpeg)
    Used with --bitrate. Pass 1 writes the stats file, pass 2 reads it, and 3 both reads and writes it. If you want to use three pass, this means you will have to use --pass 1 for the first pass, --pass 3 for the second, and --pass 2 or 3 for the third.

    --stats <string> (x264)
    none (FFmpeg)
    Allows setting a specific filename for the firstpass stats file.

    --rceq <string> (x264)
    -rc_eq <string> (FFmpeg)
    Ratecontrol equation. Recommended default: -rc_eq 'blurCplx^(1-qComp)' 
    --qcomp <float> (x264)
    -qcomp <float> (FFmpeg)
    QP curve compression: 0.0 => CBR, 1.0 => CQP. Recommended default: -qcomp 0.60

    --cplxblur <float> (x264)
    -complexityblur <float>(FFmpeg)
    Reduce fluctuations in QP (before curve compression) [20.0]

    --qblur <float> (x264)
    -qblur <float> (FFmpeg)
    Reduce fluctuations in QP (after curve compression) [0.5]

    --zones <zone0>/<zone1> (x264)
    none (FFmpeg)
    Allows setting a specific quantizer for a specific region of video.

    --qpfile (x264)
    none (FFmpeg)
    Allows one to read in a set of frametypes and quantizers from a file. Useful for testing various encoding options while ensuring the exact same quantizer distribution. 

Analysis:

    --partitions <string> (x264)
    -partitions <string> (FFmpeg)

    p8x8 (x264) /+partp8x8 (FFmpeg)

    p4x4 (x264) /+partp4x4 (FFmpeg)

    b8x8 (x264) /+partb8x8 (FFmpeg)

    i8x8 (x264) /+parti8x8 (FFmpeg)

    i4x4 (x264) /+parti4x4 (FFmpeg)

    One of H.264's most useful features is the ability to choose among many combinations of inter and intra partitions. P-macroblocks can be subdivided into 16x8, 8x16, 8x8, 4x8, 8x4, and 4x4 partitions. B-macroblocks can be divided into 16x8, 8x16, and 8x8 partitions. I-macroblocks can be divided into 4x4 or 8x8 partitions. Analyzing more partition options improves quality at the cost of speed. The default is to analyze all partitions except p4x4 (p8x8, i8x8, i4x4, b8x8), since p4x4 is not particularly useful except at high bitrates and lower resolutions. Note that i8x8 requires 8x8dct, and is therefore a High Profile-only partition. p8x8 is the most costly, speed-wise, of the partitions, but also gives the most benefit. Generally, whenever possible, all partition types except p4x4 should be used.

    --direct <integer> (x264)
    -directpred <integer> (FFmpeg)
    B-frames in H.264 can choose between spatial and temporal prediction mode. Auto allows x264 to pick the best of these; the heuristic used is whichever mode allows more skip macroblocks. Auto should generally be used.

    --weightb (x264)
    -flags2 +wpred (FFmpeg)
    This allows B-frames to use weighted prediction options other than the default. There is no real speed cost for this, so it should always be enabled.

    --me <dia,hex,umh,esa> (x264)
    -me_method <epzs,hex,umh,full> (FFmpeg)

    dia (x264) / epzs (FFmpeg) is the simplest search, consisting of starting at the best predictor, checking the motion vectors at one pixel upwards, left, down, and to the right, picking the best, and repeating the process until it no longer finds any better motion vector.

    hex (x264) / hex (FFmpeg) consists of a similar strategy, except it uses a range-2 search of 6 surrounding points, thus the name. It is considerably more efficient than DIA and hardly any slower, and therefore makes a good choice for general-use encoding.

    umh (x264) / umh (FFmpeg) is considerably slower than HEX, but searches a complex multi-hexagon pattern in order to avoid missing harder-to-find motion vectors. Unlike HEX and DIA, the merange parameter directly controls UMH's search radius, allowing one to increase or decrease the size of the wide search.

    esa (x264) / full (FFmpeg) is a highly optimized intelligent search of the entire motion search space within merange of the best predictor. It is mathematically equivalent to the bruteforce method of searching every single motion vector in that area, though faster. However, it is still considerably slower than UMH, with not too much benefit, so is not particularly useful for everyday encoding.

    One of the most important settings for x264, both speed and quality-wise.

    --merange <integer> (x264)
    -me_range <integer> (FFmpeg)
    MErange controls the max range of the motion search. For HEX and DIA, this is clamped to between 4 and 16, with a default of 16. For UMH and ESA, it can be increased beyond the default 16 to allow for a wider-range motion search, which is useful on HD footage and for high-motion footage. Note that for UMH and ESA, increasing MErange will significantly slow down encoding.

    --mvrange (x264)
    none (FFmpeg)
    Limits the maximum motion vector range. Since x264 by default limits this to 511.75 for standards compliance, this should not be changed.

    --subme 6 (x264)
    -subq 6 (FFmpeg)

    1: Fastest, but extremely low quality. Should be avoided except on first pass encoding.

    2-5: Progressively better and slower, 5 serves as a good medium for higher speed encoding.

    6-7: 6 is the default. Activates rate-distortion optimization for partition decision. This can considerably improve efficiency, though it has a notable speed cost. 6 activates it in I/P frames, and subme7 activates it in B frames.

    8-9: Activates rate-distortion refinement, which uses RDO to refine both motion vectors and intra prediction modes. Slower than subme 6, but again, more efficient.

    An extremely important encoding parameter which determines what algorithms are used for both subpixel motion searching and partition decision.

    --psy-rd <float>:<float> (x264)
    none (FFmpeg)
    First value represents the amount that x264 biases in favor of detail retention instead of max PSNR in mode decision. Requires subme >= 6. Second value is psy-trellis, an experimental algorithm that tries to improve sharpness and detail retention at the expense of more artifacting. Recommended starting values are 0.1-0.2. Requires trellis >= 1. Recommended default: 1.0:0.0

    --mixed-refs (x264)
    -flags2 +mixed_refs (FFmpeg)
    H.264 allows p8x8 blocks to select different references for each p8x8 block. This option allows this analysis to be done, and boosts quality with little speed impact. It should generally be used, though it obviously has no effect with only one reference frame.

    --no-chroma-me (x264)
    none (FFmpeg)
    Chroma is used in the last steps of the subpixel refinement by default. For a slight speed increase, this can be disabled (at the cost of quality).

    --8x8dct (x264)
    -flags2 +dct8x8 (FFmpeg)
    Gives a notable quality boost by allowing x264 to choose between 8x8 and 4x4 frequency transform size. Required for i8x8 partitions. Speed cost for this option is near-zero both for encoding and decoding; the only reason to disable it is when one needs support on a device not compatible with High Profile.

    --trellis <0,1,2> (x264)
    -trellis <0,1,2> (FFmpeg)

    0: disabled

    1: enabled only on the final encode of a MB

    2: enabled on all mode decisions

    The main decision made in quantization is which coefficients to round up and which to round down. Trellis chooses the optimal rounding choices for the maximum rate-distortion score, to maximize PSNR relative to bitrate. This generally increases quality relative to bitrate by about 5% for a somewhat small speed cost. It should generally be enabled. Note that trellis requires CABAC.

    --no-fast-pskip (x264)
    -flags2 -fastpskip (FFmpeg)
    By default, x264 will skip macroblocks in P-frames that don't appear to have changed enough between two frames to justify encoding the difference. This considerably speeds up encoding. However, for a slight quality boost, P-skip can be disabled. In this case, the full analysis will be done on all P-blocks, and the only skips in the output stream will be the blocks whose motion vectors happen to match that of the skip vector and motion vectors happen to match that of the skip vector and which have no residual. The speed cost of enabling no-fast-pskip is relatively high, especially with many reference frames. There is a similar B-skip internal to x264, which is why B-frames generally encode much faster than P-frames, but it cannot be disabled on the commandline.

    --no-dct-decimate(x264)
    none(FFmpeg)
    By default, x264 will decimate (remove all coefficients from) P-blocks that are extremely close to empty of coefficents. This can improve overall efficiency with little visual cost, but may work against an attempt to retain grain or similar. DCT decimation should be left on unless there's a good reason to disable it.

    --nr(x264)
    none(FFmpeg)
    a fast, built-in noise reduction routine. Not as effective as external filters such as hqdn3d, but faster. Since x264 already naturally reduces noise through its quantization process, this parameter is not usually necessary.

    --deadzone-inter (264)
    --deadzone-intra (x264)
    none (FFmpeg)
    none (FFmpeg)
    When trellis isn't activated, deadzone parameters determine how many DCT coefficients are rounded up or down. Rounding up results in higher quality and more detail retention, but costs more bits--so rounding is a balance between quality and bit cost. Lowering these settings will result in more coefficients being rounded up, and raising the settings will result in more coefficients being rounded down. Recommended: keep them at the defaults.

    --cqm (264)
    --cqpfile (x264)
    none (FFmpeg)
    none (FFmpeg)
    Allows the use of a custom quantization matrix to weight frequencies differently in the quantization process. The presets quant matrices are "jvt" and "flat". --cqpfile reads a custom quant matrices from a JM-compatible file. Recommended only if you know what you're doing.


MINGW를 관리자 권한으로 실행


$ cd x265/source
$ mkdir build
$ cd build
//$ cmake -G "MSYS Makefiles" .. -DCMAKE_INSTALL_PREFIX=/mingw -DWINXP_SUPPORT=ON -DENABLE_TESTS=ON -//DENABLE_SHARED=OFF

$ cmake -G "Visual Studio 9 2008" .. -DCMAKE_INSTALL_PREFIX=/mingw -DENABLE_TESTS=ON -DENABLE_SHARED=OFF -DHAVE_STRTOK_R=1
$ sed -i.orig -e "/Libs.private/d;/Libs/a Libs.private: -lstdc++" x265.pc
$ make


char* strtok_r(

  char *str, 

  const char *delim, 

  char **nextp)

{

char *ret;


if (str == NULL)

{

str = *nextp;

}


str += strspn(str, delim);


if (*str == '\0')

{

return NULL;

}


ret = str;


str += strcspn(str, delim);


if (*str)

{

*str++ = '\0';

}


*nextp = str;


return ret;

}


1) 소스 다운로드

    git clone https://chromium.googlesource.com/webm/libwebp

2) Visual Studio 2008 명령 프롬프트 열기

3) 컴파일

    nmake -f Makefile.vc CFG=release-dynamic RTLIBCFG=static OBJDIR=output ARCH=x86

ANDROID NDK: HOW TO REDUCE BINARIES SIZE – THE ALGOLIA BLOG

Android NDK and scalingWhen we started Algolia Development for Android, binary size optimization was not one of our main concerns. In fact we even started to develop in JAVA before switching to C/C++ for reasons of performance.

We were reminded of the importance of binary size by Cyril Mottier who informed us that it would be difficult to integrate our lib in AVelov Android Application because its size. AVelov is 638KB and Algolia was 850KB, which would mean that AVelov would more than double in size with Algolia Search embedded.

To address this problem we managed to reduce Algolia binary size from 850KB to 307KB. In this post we share how we did it.

Do not use Exceptions and RTTI

We actually do not use exceptions in our native lib, but for the sake of completeness, I’ll cover this point too.

C++ exceptions and RTTI are disabled by default but you can enable them via APP_CPPFLAGS in your Application.mk file and use a compatible STL, for example:

Whilst using exceptions and RTTI can help you to use existing code, it will obviously increase your binary size. If you have a way to remove them, go for it! Actually, there’s another reason to avoid using C++ exceptions: their support is still far from perfect. For example if was impossible for us to catch a C++ exception and launch a Java exception in JNI. The following code results in a crash (will probably be fixed in a future release of the Android NDK toolchain):

Do not use iostream

When starting to investigate our library size following Cyril’s feedback, we discovered that Algolia binaries had vastly increased in size since our last release (from 850KB to 1.35MB)! We first suspected the Android NDK toolchain since we upgraded it and tested different toolchains, but we only observed minor changes.

By dichotomy search in our commits, we discovered that a single line of code was responsible for the inflation:

As incredible as it may sound, using iostream increases a lot the binary size. Our tests shown that it adds a least 300KB per architecture! You must be very careful with iostream and prefer to use __android_log_print method:

Make sure you also link against the logging library, in your Android.mk file:

Use -fvisibility=hidden

An efficient way to reduce binary size is to use the visibility feature of gcc. This feature lets you control which functions will be exported in the symbols table. Hopefully, JNI comes with a JNIEXPORT macro that flags JNI functions as public. You just have to check that all functions used by JNI are prefixed by JNIEXPORT, like this one:

Then you have just to add -fvisibility=hidden for C and C++ files in Android.mk file:

In our case the binaries were down to 809KB (-5%) but remember the gains may be very different for your project. Make your own measures!

Discard Unused Functions with gc-sections

Another interesting approach is to remove unused code in the binary. It can drastically reduce its size if for example part of your code is only used for tests.
To enable this feature, you just have to change the C and C++ compilation flags and the linker flags in Android.mk:

Of course you can combine this feature with the visibility one:


This optim only got us a 1% gain, but once combined with the previous visibility one, we were down to 691KB (-18.7%).

Remove Duplicated Code

You can remove duplicated code with the –icf=safe option of the linker. Be careful, this option will probably remove your code inlining, you must check that this flag does not impact performance.

This option is not yet available on the mips architecture so you need to add an architecture check inAndroid.mk:

And if you want to combine this option with gc-sections:

We actually only obtained a 0.8% gain in size with this one. All previous optimizations combined, we were now at 687KB (-19.2%).

Change the Default Flags of the Toolchain

If you want to go even further, you can change the default compilation flags of the toolchain. Flags are not identical accross architectures, for example:

  • inline-limit is set to 64 for arm and set to 300 for x86 and mips
  • Optimization flag is set to -Os (optimize for size) for arm and set to -O2 (optimize for performance) for x86 and mips

As arm is used by the large majority of devices, we have applied arm settings for other architectures. Here is the patch we applied on the toolchain (version r8d):

We were good for a 8.5% gain with these new flags. Once combined with previous optimizations, we were now at 613KB (-27.9%).

Limit the Number of Architectures

Our final suggestion is to limit the number of architectures. Supporting armeabi-v7a is mandory for performance if you have a lot of floating point computation, but armeabi will provide a similar result if you do not need a FPU. As for mips processors… well they just are not in use on the market today.

And if binary size is really important to you, you can just limit your support to armeabi and x86 architectures in Application.mk:

Obviously, this optim was the killer one. Dropping two out of four architectures halved the binaries size. Overall we obtained a size of 307KB, a 64% gain from the initial 850KB (not counting the bump at 1.35MB due to iostream).

Conclusion

I hope this post will help you to reduce the size of your native libraries on Android since default flags are far from optimal. Don’t expect to obtain the same size reductions, they will highly depend on your specific usage. And if you know other methods to reduce binary size, please share in the comments!


+ Recent posts